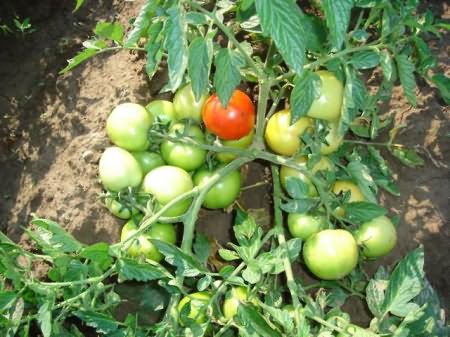
To get a good potato harvest, you can do without hilling and weeding. There is one “smart way” to avoid these routine actions. So, hilling using straw: the specifics and features of the method - below.
It is no coincidence that the described method is called “smart”. You will avoid the hassle that is inexorably present with traditional actions. You just need to find enough time to plant potato tubers, clear a certain area of the garden for cultivation, and stock up on straw or dry grass.
It is important! There is no need to dig or plow first.
Tubers are planted in the ground in a completely normal way; the distance between them should not be large. Straw is prepared and used to cover the area with potatoes to a height of 12 centimeters.
This value is minimal; you can make a layer that will be two or three times higher. This will only benefit the potatoes. In addition to straw, weeds, leaves, and remnants of herbs are also used, of which almost every garden has sufficient quantities.
And now this potato plot can be left until better times, namely, until autumn period. It is worth noting that when harvesting there will be something to do - removing straw. Using this method, the potatoes will remain above the soil surface and do not need to be dug up.
Without a doubt, the harvest will be very rich. At first glance, this is difficult to believe, but when reading various kinds Forums on the topic really convince you of the real functionality of the method. There are really a lot of positive recommendations. which have proven their effectiveness.
Which type of potato to choose
Nowadays they have become especially popular Dutch varieties potatoes, but do not forget about domestic representatives. So, for example, the varieties “Impala” and “Red Scarlet” are suitable for the central and southern regions of Russia, and “Kholmogorsky” and “Antonina” are suitable for the northern regions.
It is recommended to use tubers 3-4 cm in diameter for planting, with 5 or more eyes. Germination of tubers begins about a month before planting. The temperature in the germination room should not exceed +15°C.

It is important! Before germinating the tubers, they are dipped in a weak solution of potassium permanganate for a couple of minutes.
For a better harvest
As mentioned above, when growing potatoes wisely without weeding and hilling using straw, after the tubers are planted in the ground, they are not touched. If you want to show some kind of gardening activity, then you can periodically engage in stirring the crop. True, without exaggeration: once a month.
It is important! Experienced supporters of the method recommend using a metal stick for this.

In addition, some gardeners, before planting tubers, like to cover the desired area of land with a layer of peat, about 15 centimeters deep. Afterwards, the potatoes are laid out on a peat surface and covered with straw or other vegetation. This procedure is optional. And without it the harvest will not be bad. But it has been proven that peat filler increases the number of vegetables harvested by 20 percent.

Positive aspects of the method:
- no watering is needed, the soil will remain moist even if it is very hot outside;
- the thatch cover highlights carbon dioxide, which is very useful for potatoes;
- dry grass in the process of decay attracts beneficial microorganisms and insects, while the plant receives everything it needs for full development and growth;
- There is no need to weed and hill up the potatoes.
You can grow potatoes wisely without weeding and hilling and get a rich harvest without special effort. All you need is plenty of herbs and patience. We hope our tips will help you get a bountiful harvest of a valuable crop.
It would seem that there is nothing easier to plant and grow potatoes. From time immemorial, the favorite of our tables has been grown in vegetable gardens and it seems that all the intricacies of agricultural technology for this favorite vegetable are known. This article will help fill in all the gaps and reveal new secrets and methods for growing potatoes.
Growing potatoes from seeds is a method that gardeners do not often use. It’s easier to germinate seedling potatoes and plant them in the garden using your favorite method. However, getting potato tubers grown from seeds in a bag has a number of advantages:
- purchased biological potato seeds in specialized stores guarantee the quality of the potatoes;
- potato seeds have strong immunity to fungal and bacteriological diseases;
- the seed producer, as a rule, provides high and long-term seed germination (5-6 years) and rapid adaptation to growing conditions;
- The cost of seeds in a bag is several times cheaper than planting tubers of the same variety.
The disadvantages of growing potatoes through seedlings include:
- patient and painstaking work on sowing seeds and caring for seedlings;
- a long two-year growing period: from potato sets in the first year to a full harvest in the second year.
 Growing potato seedlings from seeds is carried out using the following technology:
Before planting, potato seeds are kept in biostimulants: root or epine, to speed up germination and enhance the immune resistance of the seeds. Then lay out in a damp cloth and place in a warm place. As soon as the seeds hatch, they can be planted.
For seedlings, peat pots and tablets are used, plastic containers and glasses, wooden boxes and other containers. The soil for seedlings should be loose, fairly loose and fertile. Before sowing seeds, the soil should be spilled with a manganese solution for disinfection.
The seeds are planted to a depth of 1 cm, sprinkled with soil and moistened with a spray bottle. The containers with the planted seeds are covered with film and placed in a warm, bright place.
 Potato sprouts appear after about 7 days. When a pair of true leaves are formed, the seedlings are picked and grown. Once a month, potato bushes are fertilized with fertilizers: Agricola, Kemira Lux, Gumi.
Before planting, potato seedlings are hardened by exposing them to Fresh air. When warm days arrive, the plants are transplanted into grooves 10 cm deep. A distance of 20-30 cm should be left between the bushes.
To protect from bad weather, potato seedlings are covered with spandbond or lutrasil. When the plants adapt, the film can be removed. The bushes are mulched, watered and fed throughout the growing season.
At the end of the season, the potato stems dry out - it’s time to collect seedlings, from which you can grow full-fledged potatoes next year.
Growing potatoes under straw
 Growing for the lazy is the name given to planting potato tubers under straw. Indeed, there is no need to dig up the soil, cover it with earth and remove weeds. And Colorado potato beetles do not like growing potatoes in straw. So there is no need to use chemicals. After 12 weeks, you should expect a harvest if you follow the following recommendations.
In the fall, it is necessary to prepare the area for growing potatoes. It is not necessary to dig up the soil. You can process the top soil layer using a Fokin flat cutter followed by sowing green manure. These green fertilizers, after mowing and incorporating into the soil, heal and enrich the soil.
In spring, the area is moistened and the potatoes are laid directly on the ground, maintaining a distance of 30 cm between tubers and 70 cm between rows. Then cover with straw or hay with a layer of 25 cm. When the plants rise to a height of 25 cm, hill up with straw. Under the straw layer, the soil remains moist, but in dry times you need to ensure that the soil does not dry out. Hilling up with straw must be done with the growth of potato bushes.
Growing potatoes in boxes
The method of growing potatoes in boxes can be used in small planting areas and in poor soils on the site. For planting, wooden box modules without a bottom are used. The sprouted potatoes are evenly laid out on a layer of fertile soil in boxes and covered with soil.

If potatoes are planted in early spring, the box is covered with film, creating a micro greenhouse. When sprouts appear, remove the film. When the tops grow to the edge of the box, another is placed on it and fertile soil is added.
The video shows how easy it is to grow potatoes in wooden boxes.
Technology for growing potatoes in bags
 On a small piece of land, every planting is taken into account square meter. Savvy gardeners have come up with a way to grow potatoes in small pieces of summer cottage space. Planting potato tubers in bags is increasingly finding its followers.
Sugar and flour sacks are ideal for growing potatoes. Fertile soil is prepared from turf or garden soil in equal proportions with rotted compost or humus. For flowability, you need to add a little sand.
IMPORTANT: The bags should be buried to ensure stability and placed in a well-lit place.
Then the bags are filled with moist soil to a depth of 20 cm and 3-4 medium potatoes with well-marked eyes are planted. The tubers are covered with earth. Next, add soil as the potato bushes grow and water if necessary. The good thing about this method is that weeding, hilling and controlling weeds and various pests does not occur on its own.
Growing potatoes without weeding and hilling, technology
 It is possible to grow potatoes with little labor. There are methods for planting potatoes that do not require weeding, hilling, weed control or even pest control. All of them are described in the article. We list the technologies for growing potatoes with minimal costs:
- growing potatoes in barrels;
- planting potatoes in bags;
- planting potato tubers under straw.
Growing potatoes in a barrel
 The barrel for planting potatoes must have no bottom. For better soil aeration, 1 cm holes are made in the sides of the barrel. The barrel itself can be made not only of wood, but also of metal, plastic, even tires stacked on top of each other. The barrel is filled with loose soil from matured compost, sand and garden soil, taken in equal proportions.
The tubers are buried 10-12 cm, leaving a distance of 30 cm. During the growth of potato bushes, the barrel should be filled with earth until it is completely filled. Potatoes in a barrel are fed 2-3 times with liquid slurry from weeds, ash solution, Potato bushes grown in a barrel do not need weeding or hilling. Diseases and pests also very rare with this planting method.
Growing potatoes using Dutch technology
 The Dutch invented a way to grow potatoes on soil ridges. The technique has long taken root in our latitudes and has proven its effectiveness. Growing Dutch potato tubers is possible not only in large areas, but also in small farmsteads. With proper use of Dutch technology, gardeners get up to two kilograms of potatoes per bush.
The essence of the method is to plant potatoes in ridges with good soil aeration. Let us dwell on the fundamental aspects of growing potatoes using the Dutch method.
Preliminary soil preparation. In autumn, mature compost or manure should be added to the soil in a proportion of 5 kg per 1 sq. m. m. From mineral supplements add potassium and phosphorus. In spring, the soil is loosened to 10-15 cm and urea is added, using 0.5 kg per 1 sq.m.
Boarding time. Potato tubers should be planted in sufficiently warm soil. An indicator that the soil is ready for planting is throwing a clod of earth from a height of about 1 m. The lump has disintegrated - the soil is ready for planting. Potatoes should not be planted in cold soil.
 Planting tubers and forming ridges. Furrows for planting are placed from north to south. Tubers with clearly formed eyes at the top are laid out at a depth of 8-10 cm. The distance between potatoes should not exceed 30-35 cm. A distance of 70-90 cm should be maintained between furrows. This distance between bushes makes it possible to get maximum sun and nutrition.
IMPORTANT: A handful of ash added to the hole during planting will provide tubers potash fertilizers and will save the potato bush from many diseases. A little onion peel will protect your potatoes from slugs.
The furrows with potatoes are covered with earth and await the appearance of the first sprouts. Then, after two weeks, soil ridges can be formed. Young potato bushes are hilled up with soil to a depth of 10 cm and a width of 30 cm. Two weeks later, the potato bushes are hilled up a second time. In this case, the earthen ridge is increased to 20 cm, and the width is formed to 50 cm. It is practical to combine hilling with weeding of the ridges.
 Watering. Farmers from Holland water their potatoes three times a season:
- before flowering;
- one and a half weeks after mass flowering;
- after flowering.
Using drip irrigation makes watering potatoes much easier.
Treatment with chemicals. To get healthy and big harvest, potato beds should be treated with pesticides 5-6 times during the growing season. For preventive purposes, tubers are treated with poisons before planting. This will protect the plants from the Colorado potato beetle and diseases.
Chinese method of growing potatoes
 You never cease to be amazed at the hard work and ingenuity of Chinese farmers. Large vegetable harvests are obtained thanks to unique technologies and the ability to work. Therefore, growing potatoes in Chinese style should be studied and tested on your own plots. Let's talk about a method that involves growing 24 kg of excellent potatoes from one tuber. Whether this is true or not is up to you to decide. But Chinese method should be taken note.
Preparing planting potatoes. Tubers for planting are selected of medium size and the so-called “waist” of 1 cm is cut out in the center of the potato. This trimming of the potatoes will stimulate the growth of eyes.
Planting hole. The hole for planting should be properly prepared with a width of 75 cm and a depth of two spade bayonets (45-50 cm).
Filling the planting hole. Three buckets of mature compost or manure, 30 g of superphosphate and a handful of ash are placed in the pit. The contents are mixed and specially prepared sprouted potatoes are placed on top. Cover it with 5-7 cm of fertile soil. This layer will allow potato sprouts to come to the surface faster.
Hilling. When the shoots grow to 10-13 cm, they should be carefully spread out on the sides and hilled up to the top. This procedure should be carried out until the hole is completely filled with soil. At the same time, the potato bush will also grow in all directions. With each hilling, you should add compost, a little ash and superphosphate to the soil in a smaller dose - 5-10 g.
Watering. In dry times, you should water the potato bushes with warm, settled water.
Growing potatoes from sprouts
 Potato sprouts are good seed material for growing potatoes. If you want to grow your favorite potato variety, but there aren’t enough tubers, then this method is perfect.
A month before the intended planting, potatoes are selected for sprouting eyes.
On the day of planting, the sprouted tubers are cut into small pieces about the size of a teaspoon. Each fragment should have 2-3 well-ripened eyes.
Potato pieces are placed in prepared furrows according to a 15x30 pattern with a planting depth of 10-12 cm. It is good to plant peas, beans or beans between the planting material. These crops improve soil fertility by enriching them with nitrogen, provide shade and repel pests.
When the air temperature rises above 20° C, potato seedlings should be mulched with mowed dry grass, sawdust, and straw. Next you need to adhere to standard care for potato plantings.
Video of Growing Potatoes under Straw
The presented videos demonstrate the production of rich potato yields under straw.
Growing potatoes in sawdust
 Many years of experience of gardeners suggested a method fast germination potato tubers in wet sawdust. At favorable conditions You can observe not only good growth of potato shoots, but also rudimentary nodules.
Moist sawdust is placed in boxes or other containers in a layer of 10 cm. Potatoes for germination are placed on them and covered with the remaining moistened sawdust. The boxes are covered with film and placed in a cool place, such as a greenhouse.
After the seedlings appear, large potatoes are cut into pieces with pronounced shoots and planted in the ground. Medium potatoes with sprouts are planted whole.
Growing potatoes in boxes
 Increasingly, gardeners are using raised or warm beds on their plots. The soil in the module boxes does not need to be dug up every year, but only needs to be properly filled once. In the future, such a bed will last 5-7 years. Potatoes can also be planted in such boxes and get a good harvest.
First you will have to put together wooden boxes without a bottom. Box dimensions: height 20-40 cm, width - 50-70 cm. The length is chosen depending on the size of the area and your preferences. Since autumn, the boxes have been filled with plant and food waste, rotted manure and fertile soil.
In spring, sprouted potatoes are laid out in ridge-boxes at a distance of 30 cm from each other with a depth of 10-15 cm. When potato bushes appear, they are mulched with dry mown grass and watered if necessary. Next, the potato bushes are grown until ripening.
Growing potatoes in the Urals
 The unpredictable weather of the Ural region does not allow the cultivation of all varieties of potatoes. It is therefore important to use seed material suitable for growing in difficult conditions weather. Varieties suitable for the Urals and Siberia Siberian selection, which are resistant to cold, drought and other weather disasters. Recommended varieties for the Urals included in the State Register:
- mid-early variety Nevsky;
- early ripening variety Udacha;
- mid-season variety belongings;
- mid-season variety Naiad;
- early variety Spring White;
- early ripening variety Kamensky.
On the forums of summer residents of the Urals, the following varieties are very popular: Natasha, Gala, Sante, Red Scarlett, Rosara, Charodey.
Mineral fertilizers for growing potatoes
 For a good potato harvest, regular application of mineral fertilizers is necessary. The process of feeding young tubers is especially important if the soil is poor and the beds have been cultivated for a long time. Such soil does not contain the optimal complex of nutrients for successful cultivation potatoes.
What fertilizers to use
- In the fall, it is necessary to add a full range of mineral fertilizers to the soil. For these purposes, ammophos, nitroammophos, and nitrophos are used. Fertilizers are diluted according to the attached instructions.
- When planting potatoes, fertilizers that have worked well include: superphosphate, nitrophoska, kemira, and ash.
- Bone meal added before flowering will improve the root system, enhance flowering and even improve the taste of the tubers.
 Fertilizing potatoes using the Mettlider method
American farmer Jacob Mittlider not only developed the famous beds for growing vegetables, but also proposed the use of a special mineral supplement for potato tubers.
So, when preparing the beds for planting, you should dig small grooves 5 cm deep along their long sides and sprinkle them with lime fertilizer made from calcium and boron. The mixture is used in an amount of 100 g per 1 linear meter. If the soil is loamy or acidified, then the amount of fertilizer applied should be increased to 130 g per linear meter.
 During the growing season, it is necessary to feed the potatoes at least three times:
- the first fertilizing is carried out immediately after the emergence of potato shoots;
- the second feeding is needed when the potato bushes grow to 15-20 cm;
- During flowering, potatoes need a third feeding.
Fertilizers are applied into a 5 cm trench dug between the ridges. Now that potato plants are growing above ground, Mittlider suggests mineral mixture, consisting of nitrogen, boron, potassium, magnesium, molybdenum and phosphorus. Fertilizers are placed in the groove at the rate of 6 40-50 g per 1 linear meter and sprinkled with earth. Fertilizing is combined with watering the potatoes.
 Foliar feeding
Potatoes respond well to foliar feeding, especially after rain. To do this, potato bushes are sprayed directly over the leaves with a solution of 3 tablespoons of superphosphate dissolved in 10 liters of water.
For cold regions with a long and rainy spring, foliar feeding with complete mineral fertilizer is important. In 5 liters of water stir 200 g of superphosphate, 20 g of urea, 20 g of potassium chloride and 1 g copper sulfate. The solution is kept for 4 hours, then the potato bushes are treated at the beginning of budding and during flowering. This quantity is calculated per 100 sq.m.
Video methods for growing potatoes
The proposed video materials will help you choose optimal ways growing potatoes.
High-yielding potato cultivation, on which the yield depends
 Full-fledged and high-quality potatoes can be obtained if the following conditions are met:
- healthy planting material of good potato varieties should be planted;
- Until the soil warms up to 10-12°C, it is not recommended to plant potatoes;
- sprouted tubers will come to the soil surface faster;
- the potato bush is formed powerful and spreading if the air temperature does not exceed 23°C;
- loose and fertile soil will ensure good potato growth;
- Watering and timely feeding with fertilizers provide a full-fledged potato harvest.
Watering potatoes, how often should you water?
 Potatoes, like other vegetables, require regular watering. Irrigation is especially necessary when potatoes bloom and summer is extremely dry. Without sufficient watering, the tubers do not gain weight and become small and ugly. The quality of potatoes without watering is much worse.
Watering rate
For normal growth, a potato bush should receive 2-2.5 liters of water every week. During the appearance of the first buds and during subsequent flowering, the watering rate is increased to 3 liters per week.
When and how often to water

IMPORTANT: A layer of mulch will help retain moisture under the potato bushes for a long time.
When to stop watering
If the bushes have matured, the leaves have turned yellow and begin to die, watering should be stopped.
Secrets of growing potatoes
 Let’s summarize and share the main rules of potato agricultural technology.
Use of high-quality planting material. Proven potato varieties are selected for planting. After five years it is recommended to change planting variety to maintain productivity.
Planting material size. The average size of a tuber is the optimal size of planting material. You can use large root vegetables, cut into pieces. Each piece of tuber for planting should have several formed eyes. It is recommended to cut the tubers lengthwise to obtain better quality sprouts.
Maintaining crop rotation. If potatoes grow in the same bed for many years in a row, this leads to a gradual decrease in yield, shrinkage of tubers and diseases. Potatoes should be returned to old beds no earlier than after three years.
Soil selection. Tubers should be planted in loose, fertile soil containing sand. This promotes soil aeration and sufficient oxygen supply to the tubers.
 Optimal depth. In the deep landing pit small potatoes and thick tops grow. The optimal depth of potato tubers is 10 cm according to the 35x70 pattern. Often planted tubers will interfere with each other's development and suffer from a lack of oxygen. And this will lead to a disease - late blight.
Correct landing time. A popular observation has long been in effect: potatoes should be planted when the leaves on the birch tree grow the size of a penny.
Broken tops. Experienced gardeners It is recommended to break off the tops a little 1-2 weeks after the potatoes bloom. The tubers will receive more nutrients. The bush will not only develop more tubers, but you will get larger potatoes.
 Getting rid of Colorado potato beetles and diseases. If you are not a chemical taker, then plant Chernobrivtsy, horseradish, tansy, garlic, and calendula around the perimeter of the potato bed. Colorado beetles cannot stand the aroma of these plants, and potato bushes will not be susceptible to various diseases.
Top dressing. Balanced feeding of potatoes will significantly increase the future harvest.
The video demonstrates the tricks of growing potatoes for optimal yields.
Similar articles
The need for hilling potatoes
 Hill up potatoes - the sooner the better. This will also replace weeding and the recommended (but not always performed) loosening. Classic - 2 hillings. But if overgrown tubers are visible from the ground, then they need to be hilled again.
As a rule, best opportunity For the first hilling of potatoes, count the time after the rain (not necessarily on Thursday) or abundant watering. This has its own 100% logic. After natural or artificial watering, a crust usually forms on the soil. It helps draw moisture from the soil depths. It is necessary to destroy this crust by destroying the suction capillaries. In addition, hilling with moist soil greatly strengthens the root (or rather, root) system. But you need to wait, of course, for the moment when the earth no longer sticks to the tools.
Time of the first and subsequent hillings
 I hill up once before flowering, but before that I pluck 1-2 times.
 This depends on the type of soil and weather conditions during the potato growing season.
- And one more thing. To make the soil more fertile, it is necessary to add organic matter to it. In addition to manure, potatoes need peat, brown coal, sawdust, beetroot and even waste (for example, waste paper). All these ingredients make the soil looser. As a result, breathability increases.
- Firstly, you will stop the excess growth of potato tops, and secondly, you will get 2-3 additional tubers.
- ready in 80–90 days (Lugovskoy, Petersburgsky, Shaman, Resource, Granola), they should be removed in early September.
You can start planting when in your region
How to hill potatoes manually: features of the process
 Hiller at the back, which is designed for filling potato bushes with soil.
So, making a potato hiller with your own hands is quite simple. To make this device you will need:
As you know, hilling potatoes is necessary to increase productivity and protect tubers from unfavorable weather conditions. That is why all gardeners who grow crops should know how and when to earth up potatoes, and also be able to use devices for earthing up.
- Potatoes love nutritious, loose, breathable soil. Therefore, for normal plant development and increased productivity, this crop must be hilled several times during the season. Hilling should be done with a hoe or hand hoe, preferably after rain or after watering, so that the soil is moist and fluffy.
- If neither rain nor watering is expected on your potato plantation, then it is still not recommended to cancel hilling. You'll have to hill up with dry soil, it's still better than not touching the hoe at all.
How to understand that you need to hill up potatoes?
Caring for potatoes using a manual hiller
 On light soils and in dry weather, one hilling to a depth of 13–15 cm is sufficient, and on heavy and waterlogged plants, hilling up to three times to a depth of 10–12 cm is sufficient.
 During hilling, be careful not to damage the tops. Be sure to loosen on both sides. And do not trample already treated areas.
- I usually leave one bunch of flowers on one variety and another on the second. As soon as the flowers begin to fade, I go to harvest the first tubers. To do this, just pull back the layer of compost and select the largest, cleanest tubers lying directly on the ground, and then carefully push the compost into place. Since damage to the stolons does not occur with this method of digging, they continue to grow the next tubers as if nothing had happened.
- B northern regions It is better to plant potatoes of early varieties, since this is how they escape late blight, and mid-early varieties that are resistant to this disease. Late varieties There is no prospect of planting in northern climates.
- The bird cherry tree begins to bloom
- It is important to note that to care for large plantings For potatoes, you can use three-row nozzles that will simultaneously hill up three rows of potato bushes. Each gardener decides for himself how to care for his plants: spend little time and a lot of money on it, or vice versa.
- Hollow pipe (length - 90-100 cm, diameter - 1 inch).
- Recently you can hear the opinion that potatoes can be grown without hilling. Of course, the roots of the plant, which are directed downwards, do not require such work, but the stolons on which the tubers appear often grow not only downwards, but to the sides and upwards. Carrying out such a procedure is necessary to form additional tubers in loose soil and mounds and improve crop yields.
- Hilling promotes the appearance of additional stolons (in potatoes, these are underground modified parts of the stems, on which tubers will begin to form after a certain time.) This simple agrotechnical technique will increase the yield by 25-30%. Early potato varieties, in which the tuberization period proceeds very quickly and intensively, especially need hilling.
There is one more circumstance that has been considered since ancient times to be “killing the second hare” when hilling. This is the simultaneous destruction of weeds.
- If the potatoes are irrigated, they need to be hilled up. At correct landing. Approximately 45 cm from row to row. Depending on the soil.
- The last hilling is carried out before the tops close, since done later injures the roots and damages the leaves.
- Not all plants need spud. For example, pepper is not worth it, an early-ripening variety of potatoes is worth 1 time, and a mid-season-late-ripening variety is worth 2 times. Tomato - not always.
Hilling potatoes with a walk-behind tractor
 When the harvest from the early row has been selected, I lay the tops on top of the row to dry, and leave them in the garden.
, and even much earlier, as soon as the very upper layer soil.
- To increase the efficiency of caring for this garden crop, it is advisable to first watch a video on how to properly earth up potatoes, regardless of the chosen earthing method.
- Hollow pipe (diameter - ¾ inch), designed for making rods: rear and front.
Over time, the potatoes grow and come closer to the surface of the earth, which indicates the need to harvest. In addition to increasing productivity, hilling protects the tubers from the hot sun or possible night frosts, as a result, they do not turn green or spoil.
I don't know the answer! but it's a good question!
Hilling potatoes with a walk-behind tractor - video
glav-dacha.ru
Planting potatoes on summer cottage: how not to dig and not spud? On the beds
The second time they hill up after about 2-3 weeks.
Processing potatoes before planting
If the potatoes are not watered, they will not hill.
When hilling, it is important not just to cut grooves, but to sprinkle loose and moist soil at the base of the stem. Not every plant is spudIt is usually not recommended to put tomato and potato tops in compost because of the solanine they contain, but under the influence of the sun, rain and air, solanine is destroyed (therefore it is better to dry the tops first). This will happen in your potato bed, so there is no need to drag the tops anywhere to dry. Leave it directly on the surface of the bed and do not cover it with weeds on top. Do the same with the second row of a later variety.
Now the most important thing: protect the potatoes from spring frosts. To do this, rows of potatoes should be covered with dry, breathable material. Hay is best suited for this, but not straw (it will attract rodents to the plantings, which will eat the young nodules as soon as they appear). You can use dry leaves or simply rake the top, but always dry, layer from the compost heap.
As you know, tubers do not grow on potato roots, but on horizontal shoots growing on the lower part of the stems, called stolons. These shoots don't need soil - they need darkness. They will grow not only in compost, but even under empty hoods made of light-proof material. So don’t worry about it. The traditional way of growing potatoes is familiar to many: they plow or dig up the ground, plant tubers in rows, when shoots appear, hill up and weed, and more than once. But planting potatoes in a summer cottage, just to provide yourself with potatoes in the summer, can be radically different from the agricultural work described - you don’t have to dig, hill, or weed. Sheet steel in order to make dumps.
In order to achieve a good harvest and protect the crop from adverse weather conditions, you need to know when to hill potatoes for the first time, as well as how many times to carry out the procedure in the future. It would be a good idea to do hilling on damp soil after rain or watering. In this case, the stolons, on which tubers will subsequently form, will begin to grow even faster. The threshold of raking on too dry soil can be very harmful to potato bushes. The oxidation theory of the nitrogen atomHow
And it is watered during the germination period.
Planting potatoes: do not dig up the bed!
In small gardens, the first hilling is carried out when the plants reach a height of 14–15 cm. The earth is raked up to the plants with a hoe in small portions so that a small mound is formed around the bush. The second hilling is carried out after 10–12 days. Plants well covered with damp soil quickly grow and bloom, intensively form tubers, which protects them from late blight and other diseases. This is necessary for those plants that form additional (additional)Leave the unrotted compost heap that you have left in place of the potato bed to overwinter as it is.
If you haven’t prepared covering material since the fall, you can use black and white newspapers or wrapping paper. They need to be torn into pieces, crumpled and covered with potatoes. There is no need to fill the row spaces. To prevent the shelter from being swept away by the wind, cover the bed with old lutrasil (spunbond) or bags. You should not use film (everything will start to rot under it).
The potato bed must be in the sun all day, otherwise the tops will be huge and the tubers small. Mark the bed directly on the virgin soil, regardless of the fact that weeds have begun to grow there. Do not dig the ground under any circumstances!
Before planting potatoes, the tubers need to be prepared. This takes about a month to a month and a half.
A blowtorch to heat the metal for bending.
There is an opinion that hilling should be carried out two or three times:
And what about laziness?
Potato varieties: which ones to plant
During the flowering period. And during the budding period.
2At least!roots
So, you just plant potatoes, don’t do anything (don’t dig, don’t hill, don’t water, don’t feed or dig up), but just harvest. But you still have to carry weeds and mown grass somewhere, so it’s better to carry it immediately to the place where you plant potatoes, but then you won’t need to carry rotted compost somewhere again. When the frosts are over, you can remove Lutrasil and start putting it on the garden bed with plantings, everything that you usually put into compost. Place the cut grass and weeded weeds throughout the garden bed, directly on the hay or newspapers, but without covering the potato seedlings. All summer you will continue to pile compost on the potato bed, covering the growing potatoes not with soil, but with weeds.
Place the sprouted tubers directly on undug soil. It is more convenient to make two rows at a distance of 40–50 cm from each other, and lay the tubers in each row 25 cm from each other. You need to leave 20–25 cm from each row to the edge of the bed. Thus, the planting width will be 80–100 cm, you can take any length. Wash the seed potatoes, then put them in a basin, add hot water (+45°C) and hold in this water until it cools to room temperature temperature. Separately, dilute potassium permanganate and add little by little to the bowl of tubers, stirring until the water turns red. pink color. Let stand for 15 minutes, drain the water, rinse the tubers and dry. This is done in order to remove tubers from the surface
Lanyard
The first procedure should be carried out when the potatoes grow 5-10 centimeters. If night frosts are expected, it is recommended to completely cover the bushes with soil to protect them from the cold. If a decrease in temperature is not expected, there is no need to cover young shoots with soil so as not to slow down their growth.
Growing Potatoes: Compost Only
Tubers need oxygen... To do this, it must be loosened, i.e. hilled
The main difficulty for a novice gardener when hilling potatoes is the question: “Where to get the soil and how not to damage the potato bushes?” I remember very well how my parents first decided to test me at the dacha as a full-fledged hiller. It was at the beginning of middle school, they gave me a small neat shoe, but I absolutely could not understand where I could get the earth to shovel it under each bush, surrounding it with a sufficient mound.
I still remember this from studying at the agricultural technical school.
For 35 years I’ve been hilling once
To retain moisture for the plant as long as possible.Is it possible to grow a barrel of potatoes from four tubers?There is one danger here. The compost, overheating, settles, and young tubers may become bare and, therefore, turn green. This cannot be allowed, therefore, when you bring the next batch of weeds, watch where it needs to be poured so that the tubers are not exposed. It is best to plant tubers the size of egg(there are about 20 such tubers in one kilogram), because such a tuber contains just as many nutrients as the plant needs to grow to 25–30 cm and have time to develop a good root system. pathogensA grinder for processing joints.It is advisable to carry out the second hilling during the period of tuber formation. This is approximately 2-3 weeks after the first, before the flowering of the crop.
When and how to harvest potatoes
more stolons will be formed - subsequently more tubers
Very soon I resolved this issue, and now even experienced people are surprised where I have so much “extra” land that I use to shed bushes. Everything is very simple, meanwhile. In order for the process to be systematized, it is necessary not to revolve around one bush from all sides, trying to move on to another only after work on the first is completed. It is necessary to process several bushes on one side at once. For example, from the north. Process several rows in this way, creating an almost continuous earth bank. After this, turn 180 degrees and tackle the opposite side of the bushes (for example, the southern side, respectively). Making this shaft symmetrical. Then everything will be in order: beautiful and effective.
It’s true that I studied to be an accountant, but I remember the subject “Technology of the Agricultural Industry.”
and why not spud her... it is sold on the market hilled...
44348512:09, 06/16/2009 No. 761 from 06/16/2009
No, you can’t, not only from 4, but also from 8 tubers. Every plant can produce within certain limits, and no amount of care can force it to produce beyond its potential. In addition, potato stolons grow on a stem no longer than 40–60 cm. It is to this height that potatoes should be hilled. I once read in the magazine “Homestead Farming” that you can grow a full barrel of potatoes from just 4 tubers. To do this, it was proposed to take a barrel without a bottom, fill it with 20 cm of fertile soil, place 4 sprouted tubers on it and sprinkle soil on top. Then, as the potatoes grow, gradually add any light debris on top, mixed with soil, until the barrel is full. From time to time the potatoes had to be watered and fed. The author claimed that when you tip the barrel on its side after the crop has ripened, it will be full of potatoes. Imagine my disappointment when the potatoes in my barrel were only in the top layer of soil, only 40–50 cm deep!
Do I need to add anything when planting potatoes?
If you plant tubers that are too small, it is better to put 2-3 tubers in one nest at a time, otherwise there will be too few stems, and, accordingly, the harvest will be small.
Welding machine. The third procedure for caring for potatoes can be carried out when the bushes grow by about 25 centimeters. There is no need to fill them completely, just sprinkle the base. You can also throw some soil between the branches of the bushes so that they grow wider.7ya.ru
why do you need to hill up plants?
Alex
When hilling, additional roots grow on the lower parts of the stems, which are covered with soil, which improves the nutrition of the potatoes. An additional crop of tubers grows on these same roots.
q q
Never be afraid to over-fill a bush. The main mistake is insufficient sprinkling, not excess. At the same time, you should never get carried away with “building” entire mountains. If we do not take precautions, we will expose the roots and cause nothing but harm to the potatoes. The soil must be taken from between the rows, from the very middle of them. Do not stir up the soil next to the sprouts. This way, you can forget yourself and chop off the roots and cut off the sprouts if the hoe is sharp.
tree
Like I do for myself.
We are 1 time!
The editors of the newspaper “MY!” I receive a lot of letters with questions to the expert in the garden section, Ivan Vasilyevich Babin. Many of them relate to perhaps the most popular crop in Russian dachas - potatoes. For example, Oleg Semyonovich Krutskikh asks in his letter: “I always, as expected, hill up potatoes several times a season, but for some reason I get a bad harvest. How can this be explained? Ivan Babin believes that hilling potatoes is the most common mistake made by summer residents. “Until recently, no one thought about the advisability of hilling potatoes,” says Ivan Vasilyevich. - Many people consider this agricultural technique mandatory. But there are specialists, including myself, who have studied, tested and proven in practice that hilling potatoes is a rather labor-intensive agricultural practice, and does not always bring benefits; more often than not, it actually harms the crop.
For the appearance of adventitious roots and improved plant nutrition, loosening the soil. In potatoes, this operation stimulates the formation of tubers.
No need, because everything you need for potatoes nutrients found in plant residues.
If you place tubers that are too large, then with a large amount of nutrition, the above-ground part will grow, and the development of roots will be delayed. Therefore, large tubers must be cut along the tuber in advance so that there is approximately the same number of sprouts on each part. Let them sit for two days so that the cuts become corked, then sprinkle them with ash and only after that plant (otherwise rotting bacteria will penetrate into the tubers through the cuts).
Instead of potassium permanganate, you can use a solution of Fitosporin. A small amount of Dilute the preparation in water to obtain an almost transparent solution, and pour this solution over the tubers for half an hour. Then, without rinsing them with water, dry them.
To make a potato hiller with your own hands, you need:
When color appears on a crop, you need to hill up or weed the crop very carefully. During this period, tubers begin to set and can be damaged.
Hermes Hermesov
It makes sense to carry out hilling if it is possible to provide watering; hilling should always be done with moist soil.... If potatoes grow in field conditions With natural watering, there is no point in hilling them up; they were lucky enough to hill them up or fluff them up slightly; it would be better to bury them a little deeper. Otherwise, they raked up the slightly damp soil around and uncovered the layer of moisture... Well, it dries further closer to the roots. In any case, the soil needs to be fluffed a couple of times during the season and there will be fewer weeds and better roots. .
Tatiana
If, during hilling, half or more of the foliage is covered, the plants need to be corrected. Gently shake off the soil from them, remove the sprigs of tops from the soil, redirecting them upward.
Every time I weed, I leave them to dry in the sun for a day. I go through the weeds with a Fokina flat cutter.
we usually 2 times..
Alexey Kuznetsov
Proponents of hilling believe that after sprinkling the stems with soil, additional roots are formed there, on which tubers are formed. But they can only form if this soil, both during hilling and subsequently, almost until harvesting, is constantly moist and loose. But not everyone can water potatoes often, and some don’t water them at all.
Hilling up potatoes can destroy the crop - Voronezh informational portal MY! Online
Before following the traditional rules for growing garden crops, you need to understand their meaning.
to retain moisture in the soilDo I need to water potatoes planted this way?
You won't find roots in dry soil.
Place the tubers in the light for
Make vertical stand, rear and front traction. This stage consists of making a bend from a 100-centimeter pipe at approximately 30 centimeters of this pipe. It is optimal to do it using a pipe bender. The manufacturing process of the front and rear linkages can be better understood by watching a special video.
Before you start hilling the potatoes, you need to pull out all the weeds in the area. You don’t have to remove the grass, but leave it on the ground. When it dries, it will become an excellent protection against sun rays. It is best to carry out potato care procedures not in the middle of a hot day, suffering from thirst, but to do it early in the morning or in the late afternoon when the sun's activity decreases. After all, in any case, when hilling, you slightly disturb the plant’s system, and it may wither.
Dutch technology... there they grow up to 60-70 cm, but they prepare the ground, there is a problem.
Loosen, not hill up
After we move on to other bushes, we may find that a whole volleyball court has formed between the already treated ones. This means that, while hilling, we happily trampled from place to place and compacted the earth so much with our feet that you couldn’t dig it up with any shovel. If so, then it is not beautiful at all. We need to go back and go through everything trampled down, loosening the soil. And from now on try to cross as little as possible, only in case of emergency.
See for yourself
The next day I do the hilling. The more the better.
As a rule, 2 times. But every rule has exceptions. Therefore, more is possible when weeding or loosening after watering (rain).
newspaper.moe-online.ru
how many times per season should you hill up potatoes?
Alexey B
But the harm from hilling can be great, especially in dry summers.
Some of us have already harvested potatoes, others are just about to do it. One way or another, but several times a season everyone who grows “second bread” has to do this operation.
It’s not necessary, because plants, like you and me, consist of 75-80% water, which, when they rot, is released and flows down to the roots.
It is better to plant potatoes in the water row extra early variety in order to enjoy young potatoes as early as possible, and plant a mid-season variety in the second row so that there will be enough young potatoes until the end of the season.
vernalization
Masha *dream*
Make a double moldboard plow. To make dumps you will need two concave round plates. These discs must be installed at a certain angle and connected using a welding machine.
Andrey S
The basic rules for understanding how to hill potatoes will be described below. To manually hill potatoes, you do not need to have supernatural abilities; it is enough to have a hoe or hoe and be able to use them. A hoe is the most popular tool used by gardeners to care for plants. It can be trapezoidal, triangular, have sharp or rounded edges.
***You and me***
Well, why, the guys wrote above. The matter is purely voluntary - if the soil is good and the place is good. so she will give birth anyway.
Jack Daniels
There is a potato processing technique called Dutch. I’ve been using it for about 20 years now. The gist of it is that when loosening the row spacing, at the first shoots, pour a bunch of earth onto the sprouts, as when hilling. Potatoes covered with a ridge will come out in a few days, but when stressed, they will give a couple of extra roots, on which an additional amount of potatoes will grow. They do this a couple of times as the tops grow and they forget what potatoes are until they are harvested. And you need to hill up potatoes so that the tubers are placed underground, and do not climb out and do not turn green in the sun. The critical mark for hilling is the set of colors. Then the bush will become spreading and can be easily damaged.
Olya Astakhova
The main condition is moist, loose, irrigated soil.
Hedgehog in a bucket
2 times, but after heavy rain or “killer” watering of our grandfather, we need to walk again when it dries out.
Gulilya Papin's Docha
1. Imagine a flat soil surface. Every day a certain amount of moisture evaporates from it. Now imagine: you have hilled up and made the soil wavy, like an accordion. Thus, you have almost tripled the soil surface in the same area. This means that three times more moisture will evaporate from this surface every day.
Leah
Why do you need to spud? Simply answering this question, let’s say: “It grows better this way. The fact is that the root system of potatoes is superficial, it goes more in width than in depth. And in loose soil, the roots occupy more space between the rows. They love soft soil and tubers. There is noticeably more hilling in the hill, since the soil resistance here is less.
Lidiya Gultyaeva
Will the perennial weeds on which we spread the potatoes grow?
Sergey
Early varieties
Evgenia Taratutina
(or greening) for 15–20 days. This is done so that the plant poison corned beef is formed in the subcutaneous layer. Such green tubers will not be touched by rodents or gnawing insects. The easiest way is to keep dried tubers in glass jars on the windowsill, turning the jars from time to time. Or spread the tubers in one layer on newspapers on cabinets or window sills.
N.V.
Make a pruning knife. This stage is very important when making a hiller, since it is the knife that takes on the main resistance when the plow is buried in the soil. A sheet of steel needs to be cut into the shape of an arrowhead with acute angle 45 degrees, then weld the tip to the bottom of the post and grind it.
Vladimir Bendrikov
There are at least two ways to hill potatoes manually:
When and how to hill potatoes?
Why do I need extra work? That is, from a biological point of view, everything seems to be correct - more roots, more potatoes. . But I don’t have seven benches; I have enough of what grows without hilling. But I remember with my mother-in-law they planted and received a 1:1 ratio, although they hilled up, poured fertilizer, and caught the beetle. And now I have 1:10 without all this
Ins
The best option is to place the potatoes under mulch. I tried it last year, great results and no need to hill up.
When
I only plant 2 buckets. I hill up 2 times.
2. In this case, the soil will overheat more, and the potato crop does not tolerate heat. At temperatures above +26°C, the formation and development of tubers completely stops.
If the potatoes are not hilled, then in dense soil they grow with their roots down, which reduces the food supply. The tubers turn out clumsy and crumpled. Yes, and the little thing will be almost the same.
If they don’t grow, they will die under thick compost without light, and in just one season, their roots will also die. In the fall, you will see this for yourself by raising the compost heap to the soil.
Potatoes are ready for consumption 60–70 days after emergence (Early Spring, Lark, Bullfinch, Luck, Anosta, Prior, Latona, Ostara, Skala). They can be eaten from mid-July. These varieties should be removed at the beginning of August, otherwise they will simply rot in the ground.
Then you need the tubers
Today, to facilitate potato care and speed up the hilling process, you can purchase a special walk-behind tractor. The advantage of the walk-behind tractor is its universal use: from loosening the soil to harvesting. The disadvantages of this device include its high cost, as well as an increased likelihood of damage to potato tubers.
The first method is to rake the soil to the bush from all sides. Thus, you get one “bouquet” of stems.
Z V Y N K A
How do you manage to get such a harvest yourself 10 please share.I took a video at random, it might be interesting, there’s a ton of them on YouTube!
I spud 2 times. The 1st, as soon as it sprouts, the 2nd after 2 weeks. Moreover, I don’t just hill up, but pour more earth into the middle of the bush so that the stems move apart. This way they will get more sun and additional roots will form. I plant sparsely so that there is somewhere to get land for backfilling. I did this procedure yesterday. It's so beautiful.
3. Tubers develop well and grow large and smooth in loose, moist and oxygenated soil. They grow into different sides from the bush and mostly between the rows. And having hilled the bushes, you raked away a layer of loose soil from the row to the bush, and a deep furrow formed between the beds. But some people hill up 2-3 times and try to dig or plow each time. And where should the tubers grow now? They form directly under the bush, where it is cramped, dry and often the soil becomes very compacted without loosening. The yield from this only decreases and worsens, and does not increase.
In addition, it accumulates in the grooves rainwater- root crops receive more moisture. In a word, it is necessary to hill up, earlier, more often and higher. This improves gas exchange. The higher the mound, the more lateral underground shoots. The soil not only loosens, but also retains moisture. That's why it's better to hill up after rain or watering.
Mid-early varieties
germinate
In the case of processing potatoes using a walk-behind tractor, during planting you need to make sure that the distance between the rows is fixed and the same. To do this, it is recommended to use a special marker and use it to draw lines on the beds. According to the second method, the stems need to be moved apart in different directions and only after that pour the soil into the middle of the bush.
You don’t have to hill up, but then most of the tubers will grow in the light and will be green and inedible.
The most common village option is hilling potatoes when the bush has grown to 30 cm. Then, after weeding, they hill up the potatoes using a hoe, plow, or tractor (depending on what you planted under).
It seems to me that when choosing a day for hilling, you need to pay attention not to flowers or lunar calendars, but to the height of potato sprouts, the first attempts of potato tops to crumble, and soil moisture.
before flowering. then it’s better not to touch the roots.
Then what should you do if you don’t hill up? During the summer, until the rows of tops are completely closed, the row spacing must be loosened. You can loosen it with hoes, preferably with a Fokin flat cutter or, even better and faster, with a planet. You need to loosen shallowly, 5 - 7 cm. Loosening should be carried out after rains or watering, when the soil dries out and crumbles, as well as when weeds and small cracks appear in the soil. This technique will protect the soil from weeds and saturate it with oxygen. The loose top layer of soil prevents moisture evaporation and creates ideal conditions for the vital activity of worms and soil microorganisms - our main assistants in increasing soil fertility. As the bushes develop and increase, the width of the strip that we loosen must be reduced.
YanaMarina
It is believed that it is necessary to hill up during the formation of buds. It is now that tubers begin to form. To help the potatoes, you need to not only rake the soil, but also move the stems apart. This way the plant will receive more light and space.
Covacha
As soon as the potatoes begin to bloom, tubers on the stolons begin to grow at the same time. Potatoes spend a lot of energy on seed propagation through flowering, so if you don’t let it bloom, then it will direct all its energy to vegetative propagation, growing tubers.
ready for use in 70–80 days (Nevsky, Sineglazka, Detskoselsky, Elizaveta, Charodey, Skazka, Rainbow, Naiad, Sante, Impala) and should be harvested at the end of August.
Registrar
: to do this, they need to be put in a dark and warm place. It is convenient to arrange them according to cardboard boxes in one layer, not too close to each other (to give freedom to the sprouts), then lay a layer of newspapers and lay out two more layers, interlayering them with newspapers, close the box and place it on a stool near the radiator. It will take about two to three weeks for sprouts 4–5 cm long to form.
To carry out hilling of potatoes, the following are installed on the walk-behind tractor:
Marat 111
When hilling, make sure that the mound is wide and high. In this case, the tubers will have more space, and they will be able to grow wider and wider.
Katalina
do you need it?
bolshoyvopros.ru
Can anyone explain from a biological point of view why the hell should potatoes be hilled?
125aaa
There is also the Dutch method of hilling, this is when you cover the potato sprouts with soil (hill up) and do this a couple of times.
Let the length of the sprouts be about 15-20 centimeters.
Water and spud, water and spud. Until the bushes grow.
Irishka
If someone doesn’t want to take my word for it, I again suggest conducting an experiment. Try half the beds of all varieties that you grow, do not hill up, but only loosen several times. Do all other types of work (feeding, protection from pests and diseases, etc.) equally over the entire area. When harvesting, dig separate beds and compare the yield.
Liana
Irina Vyacheslavovna
Please note that almost everything foreign varieties Potatoes almost never bloom! This is one of the areas of potato breeding work. Flowers and seeds are not needed, tubers are needed.
Diana
Mid-season varieties
Liliya Nikolenko
Sergey Chumak
Two baking powders on the front of the device.
A manual hiller is the most affordable and convenient device for caring for this crop. You can buy a manual potato hiller at a hardware store, or you can make one yourself. This device is used to cultivate soil between beds. Its design is very simple. It consists of a handle - a handle and two blades, on each of which a blade is attached, located at an angle of 45 degrees to the ground. To carry out the procedure, simply pull the device forward, holding the handle, and adjust the blades in the desired direction.
Kurdyumov wrote interestingly about this in his books" Smart vegetable garden, garden,... something else" If you come across it, read it. There are many answers to many of our questions on how to make life easier for yourself in the country and at the same time get a guaranteed harvest
[email protected]
There are a lot of videos on the Internet about different types Hilling potatoes, you can find all these videos on YouTube. But as I know, we always hilled potatoes twice a season. First when he came in and then again after some time.
LARISA ZHUKOVA
Potato sprouts look straight up at first. This is an indirect sign that it is too early to hill them. And as soon as the first signs appear that they are deviating from their verticality, it’s time to start tackling them. If they fall into the aisles (scatter), this will make hilling very difficult.
Vladimir
Twice.
I want to immediately reassure those who think that in uneducated beds many tubers will end up on the surface and turn green. Yes, perhaps there will be a little more of them than usual. But they will be great for seeds. In the fall, it is still recommended to keep potatoes for planting in the light for 2 - 3 weeks and specially green them (I will tell you more about this in the following issues). So it's not a big problem. But in all other respects, refusing to hill up is only a plus. I wish you good luck!
Svetlana Klochkova
After hilling, apply liquid fertilizer. It is advisable to sprinkle the row spaces themselves with mulch, which will prevent the appearance of weeds and promote dew. The condensation mechanism will work: something like fogging up a bottle taken out of the refrigerator. Moisture in the air, in contact with cold objects, appears in the form of dew. The latter is easily absorbed into loose soil. Nitrogen also gets to the potatoes from the air. So hilling also solves the problem of fertilizing root crops.
Of course, pick off the nascent buds large field unrealistic, but we are talking about a couple of potato beds in a small area, so I advise you to cut off the tops of the potatoes as soon as the plants in the rows close together.
Do I need to hill up tomatoes? How many times should I hill up potatoes?

To get a good potato harvest, it is important not only to choose the right variety. It is necessary to take into account the characteristics of the region and choose The right way landings. A competent approach to care is also important. At proper organization a rich harvest will not keep you waiting.
Features of planting potatoes
IN middle lane In Russia, potatoes begin to be planted in early May. The earth should warm up to at least 10 degrees. Potatoes belong to the nightshade family, so it is not advisable to plant them after tomatoes, eggplants and sweet peppers.
The best predecessors are cabbage, beets, legumes, greens, cucumbers and green manure. For potatoes, sandy, loamy or chernozem soil is preferable.
Clays are too heavy, potatoes will not grow well on them. You need to prepare the soil in the fall: plow it, fertilize it. You can sow green manure, such as mustard or rye. In spring, the soil needs to be plowed together with green manure.
To plant potatoes, the area must be sunny and protected from the wind.
There are a large number of ways to plant potatoes. It is necessary to take into account the variety, location of the site and soil type.
Preparing potatoes for planting For planting, seed potatoes must be selected in the fall. Most suitable size
tubers - 4–5 cm (weighing approximately 70–100 g). It is also better to green potatoes in the fall. This way rodents will not eat it and it will be preserved better. To do this, it is enough to keep it in the sun for several days.
When sprouting, white sprouts form on the potatoes. The seed must be germinated a month before planting.
To do this, scatter the tubers into low boxes in 1-2 layers and place them in the light in a warm place. Sprouts 1–2 cm in size should appear. If the weather is still cold and the sprouts have already grown, then the boxes should be placed in a dark place again. You can treat the tubers with a growth stimulator before planting. For example, Epin or Zircon. If you purchased planting material from a suspicious place, it is better to treat the tubers against infections. To do this, it is recommended to place them for half an hour in warm water
(about 45 degrees) or in a 0.1% solution of boric acid.
There are many methods for planting potatoes. There are common ones and quite rare ones. Almost everyone has both advantages and disadvantages. Therefore, it is better to try a new method on a small area. Over time you will find the most suitable one.
In a barrel
Will need old barrel with a bad bottom or without it at all. In a good barrel you will need to lay a 20–30 cm layer of drainage. Then add 30 cm of fertile soil. If the soil is heavy, you can add 1/3 sand. Place potato tubers on the soil and cover them with a 20-centimeter layer soil mixture. When the potatoes sprout, they will need to be covered with soil until the barrel is filled.

Growing potatoes in a barrel is suitable for regions with cold climates
The advantages of this method:
- space is used sparingly;
- protects against pests;
- no weeds;
- The harvest ripens early.
But this method also has disadvantages:
- there is a risk of waterlogging, which will lead to tuber rot;
- quite labor intensive;
- not suitable for regions with hot climates.
In boxes
A popular method for those who have small gardens. Growing is similar to the previous method. First you need to put together a bottom from boards and nail stakes 1–1.5 m high on the sides. You can do without a bottom and just drive the bars into the ground.

Growing potatoes in boxes is suitable for owners of small plots
As the tops grow, you will need to nail down the boards and cover them with soil. If you plant potatoes in mid-May, then by mid-July you should stop adding soil. The time for flowering will come.
In mid-September - early October, the tops are cut off and the potatoes are allowed to ripen for about a week. Next, all that remains is to disassemble the boxes on the boards and collect the potatoes.
This method will allow you to grow a whole bag of potatoes per 1 m2.
In a bucket
The method is similar to planting in a barrel, but with some differences:
- You must make holes in the bottom of the bucket;
- Only one tuber needs to be planted;
- Such a mobile bed can be placed in a greenhouse to speed up ripening.
On the ridges and ridges
Ridge planting is used in farms, because that’s what the technology is designed for. Planting is carried out with a potato planter, hilling is carried out with a hiller. Manual labor is reduced to a minimum.

Ridge planting is used in industrial cultivation potatoes
When planting, make a distance of at least 60 cm between the rows, and between the holes about 30 cm. As the tops grow, they hill them up, forming a ridge. This method has proven itself well on wet soils.
A special feature of the method is the ability to prepare the soil in the fall. In the spring, you can start planting without digging again.
Some people plant potatoes in beds. It is believed that this increases productivity. The tubers are placed in a checkerboard pattern. They are covered with soil and sides are made, forming a bed. Hill up 2-3 times per season. The first time you need to bury the tops completely when they grow by 5 cm. The second time is after the tops grow by 15 cm, and the last time is before flowering.
Video: forming a potato ridge
Under the film
An ideal solution for regions with dry summers. For planting you will need black film. You need to mark the area of the bed, cover it with film and dig in the edges so that it does not blow away.

Growing potatoes under film is well suited for the south of Russia
It is necessary to get rid of sharp objects in the area. Even thick grass can damage the film.
Next, in the places where the potatoes are planted, cuts are made crosswise on the film, about 30 cm long. A distance of at least 20 cm must be maintained between bushes, and about 40 cm between rows. Make a hole and plant potatoes in it.
This method has a number of advantages:
- no dry crust is formed on the soil surface;
- quite easy to implement;
- will help get rid of weeds;
- ideal solution for regions with frequent droughts.
But it also has several disadvantages:
- financial investments are required;
- the film is easy to damage;
- poor soil ventilation;
- It is difficult to organize watering.
At home
Growing new potatoes all year round is not a myth. If you know the characteristics of the plant, you can grow potatoes right on the balcony. The main thing is to prevent the tubers from germinating and force them to divide.
To do this you will need a box about 30 cm high.
- Pour a 5 cm layer of compost soil onto the bottom of the box.
- Place the tubers on top of it. It is better to leave the distance between them no more than 5 cm.
- Cover with earth.
- You can do 1-2 more layers in this way.
The optimal temperature is 25–30 degrees. Water not too much once every 1-2 weeks to prevent the potatoes from rotting. After 4–5 months, white potatoes will be visible on the surface. With a lack of air and high temperatures, sprouts will not appear and young tubers will form. It is better to take larger than medium-sized potatoes for this method.
All not
A method that is becoming increasingly popular. It’s not surprising, because you need to put in a minimum of effort. With this method, you don’t have to dig up or loosen the soil. Even an untouched area with perennial grass. But in the fall it will be much easier to dig it up. It is in this way that potatoes can be cultivated on heavy soils.

Growing potatoes in hay is easy even on heavy soils
The tubers should be placed on the ground or small grooves or holes should be made. Place a layer of hay or straw on top. As the tops grow, they are covered with hay on top. Grass or weeds mowed on the site after weeding are suitable for this. In the fall, all that remains is to get clean tubers.
But the method also has disadvantages:
- requires a lot of dry grass or straw;
- Moisture is retained in hay worse, therefore, you will have to water more often;
- there is a high probability that there will be mice.
Video: harvesting crops grown under hay
From the peepholes
Many potato growers agree that when planting with eyes, the yield is much greater. After all, a shoot grows from every eye. When there are many of them, they compete with each other and only one actively grows, but when planted with separate eyes, this does not happen. Varietal potatoes are especially often bred this way..
Healthy medium to large sized tubers are suitable for planting. They are prepared a month before the intended planting. Sprouts of about 1 cm should appear on them. Before planting, the tubers are cut into pieces. When dividing, it is worth remembering that an eye must be present on each slice. You can place slices in rows more often than whole potatoes. Be sure to add a layer of compost to the bottom of the groove.

Planting potatoes with eyes significantly increases yield
You can plant the eyes in peat pots or a shallow box at home in early spring. When the time comes for planting, you will have seedlings with leaves and small young nodules. You can grow potatoes this way very early.
Care is no different from other planting methods. The main thing is not to miss the hilling time and water in sufficient quantities.
On hydroponics
The soilless growing method is becoming increasingly popular. Its peculiarity is that the plants are planted in a special substrate, which most often resembles coconut fiber. Nutrient material is diluted in water, which is watered and sprayed on the plant. This method has the advantage of having no risk of disease. And when the right approach You can harvest all year round.
To plant potatoes, you will need boxes 30 cm deep and with sides 23 cm. Vermiculite is used as a substrate. Potatoes are placed on a 7-centimeter layer. As the tops grow, it is added to the edge of the box. The nutrient mixture is similar in composition to mixtures for other crops, but is enriched in phosphorus and poorer in nitrogen.
This method is not popular among gardeners, as it requires a lot of money to purchase a hydroponic installation.
Growing early potatoes
If you grow early potatoes, you can not only enjoy fresh vegetable before others, but also to sell it. The planting technology differs from the later one only in terms of timing. But for best result rules must be followed:
- use early varieties for planting;
- choose healthy medium-sized tubers;
- be sure to germinate planting material;
- fertilize the soil.
The main role is played by the planting date. For early potatoes The beginning of April is approaching. In open ground, the soil may not be ready. It's better to take advantage peat pots for planting seedlings. You can cover the planting area with agrofibre or film to prevent frost from destroying young shoots.
Plant care
A rich harvest requires proper care. After planting, the soil must be regularly loosened and weeds removed so that healthy and strong shoots appear. In addition, watering is necessary. After sprouting, the potatoes will need to be hilled up, fed and treated against pests and diseases.

Proper care of potatoes is the key to a good harvest
Before applying fertilizers, it is necessary to analyze the quality of the soil, because excess fertilizing can have a bad effect on the harvest. The main fertilizers for potatoes are a solution of chicken manure and slurry. If necessary, you can add solutions of mineral fertilizers.
Watering potatoes
You need to start watering the potatoes after the formation of buds.. Before doing this, you need to make sure that the soil is dry enough. Overwatering can lead to rotting of the tubers. Watering is done in the evening. One bush needs at least 2 liters of water. After watering, it is advisable to loosen the soil.
How to get rid of weeds
Gardeners always have to deal with such a difficulty as weeds. You can use herbicides, but not everyone wants to poison their garden with chemicals. You won’t be able to completely get rid of them manually, but you can reduce their number by taking preventive measures:
- Dig up the garden in the fall and spring, picking out the roots. It is better to use a pitchfork, as a shovel cuts the roots, and they grow even more.
- In autumn, cover the area with film. In the spring, remove and dig up. There will be significantly fewer weeds.
- Carry out weeding on time. If the seeds ripen on the weeds, then next year there will be even more of them.
- Do not put grass with seeds in the compost pit. Woodlice, for example, needs to be dried.
- Do not use fresh manure.
Weeding of potatoes is carried out twice a season during hilling. The first time is when the sprouts grow to 4 cm, and the second time when they reach 20 cm.

It is better to use a flat cutter or hoe for hilling potatoes rather than a hoe.
You can significantly reduce the number of weeds if you use covering material. For example, cardboard or black agrofibre.
Treatment against pests and diseases
The main potato pest is the Colorado potato beetle. You can use a folk remedy and treat the area with ash during planting. If folk remedies do not help, the area is sprayed with special preparations.

If you plant calendula or beans around the perimeter of the site, you can repel Colorado potato beetles
Another potato pest is wireworm. You can fight him the folk way. Along the perimeter of the site you need to make several small holes about 50 cm deep. Place chopped beets or carrots on the bottom. Cover the top with shields made of metal or wood. After two days, open a kind of trap and throw out the collected larvae.
Potato varieties
- type A has dense pulp and does not overcook;
- type B has dense, mealy pulp and does not cook well;
- type C has soft flesh and boils well;
- type D is completely boiled.
Varieties may also differ in the color of the tubers. They come in white, red, purple, yellow and pink.
According to the duration of ripening, varieties are:
- super early - the first harvest can be harvested after planting within 35 days;
- early - ripen on the 50th day;
- mid-early - average ripening period 65–80 days;
- mid-season - reach full maturity in 90 days;
- medium-late - up to 110 days;
- late ones - ripen for more than 110 days.
Video: choosing the best potato variety
Features of growing potatoes in the regions
For different regions, you need to choose the appropriate planting method and variety.
In Siberia
Due to the short summer, it is difficult for residents of Siberia to grow a good potato crop. Tubers begin to be prepared for planting at the end of March. To do this, they are placed in boxes for germination. Can be planted from mid to late May. To achieve better results, you can add fresh manure in the fall. It is not recommended to do this in the spring.
The most common planting methods are in rows and in a ridge. During the first hilling, the seedlings are completely covered with soil due to the risk of frost.
Early varieties begin to be harvested in mid-August, late varieties in September-October. When the tops begin to darken, you can mow them and leave the potatoes to ripen for another 5–7 days. For storage, choose smooth tubers without damage.
It is better to choose early varieties for breeding in Siberia so that they have time to ripen:
- Adretta is the choice of many gardeners in Siberia. An early ripening variety with excellent taste. Stores well under appropriate conditions;
- Agata is an early variety. The tubers are light yellow, oval-oblong. Potatoes have good taste, starchy, slightly overcooked;
- Prior is an early ripening variety. Oval tubers yellow color. It has good taste and excellent keeping quality. Moderately resistant to late blight, viral diseases and scab;
- Jelly - mid-season table variety. Oblong tubers of yellow color.
Video: two potato harvests in Siberia per season
In Belarus
Belarus is considered the birthplace of potatoes. Here it is valued and called “second bread”. Since the country is divided into three climatic zones, planting methods are selected based on this. The most popular varieties who have proven themselves good harvest and disease resistance:
- Dolphin;
- Lapis lazuli;
- Uladar;
- Stonefly;
- Treasures
Prepared potatoes are planted when the soil warms up to 10 degrees. If the temperature is lower during planting, seedlings will appear later.

The Dolphin variety was bred by the Belarusian Research Institute of Potato Growing
In dry regions, it is better to choose smooth planting or beds. In this case, you need to deepen the tubers to a depth of about 9 cm and hill up the potatoes once. The rest of the time the soil is loosened. If the moisture is sufficient, then you can plant in ridges.
Belarusian scientists are actively developing new varieties of potatoes, which are valued and grow well both in Russia and Ukraine.
Video: how potatoes are grown in Belarus
In outskirts of Moscow
A favorable climate for planting prepared tubers is established in early May. There is a popular saying that it is time to plant potatoes when leaves the size of a penny bloom on the birch tree.
Based on the composition of the soil, a suitable method is selected. On chernozem, smooth, ridge and row methods are popular. The distances between the rows are about 30–40 cm. If the planting is too spacious, hollows, that is, voids, can form in the potatoes. For loamy soils, it is better to choose the straw planting method. It is not necessary to deepen the tubers into the ground.
After the last hilling, before flowering, you can put hay or sawdust around the bushes.
You need to choose mid-early varieties that will ripen in 70–90 days, for example:
- Tuleevsky;
- Son;
- Anniversary of Zhukov;
- Cast iron.
In the Urals
The weather in the Urals is unpredictable; frosts can occur even in June. For potatoes, it is necessary to prepare a place for planting in the fall. To do this, you do not need to dig up the ground, but cover it with straw or mown grass. During the decomposition process, heat will be released, which will allow you to plant potatoes at the end of May. The tubers are covered with straw on top and added as the tops grow.
It is better to take your time and plant potatoes between June 10 and June 20. When placed in warm soil, it will quickly grow. A plus late landing there will be an absence of Colorado potato beetles.
Varieties for this region should be chosen early and mid-early, which will reach maturity in 2–3 months, for example:
- Governor;
- Bullfinch;
- White Spring;
- Bezhitsky;
- Effect.
Video: growing potatoes in the Southern Urals
In Donbass
Due to the hot and arid climate of the region, suitable planting methods are chosen, for example, planting under film. Deep plowing of the soil, 30–32 cm deep, and a planting pattern of 50 by 50 cm are preferable. The width of the bed is at least 70 cm.

The drought-resistant early variety Alena can be grown in different regions as it adapts to soil and climate
It is necessary to plant potatoes as early as possible so that they have time to “grab” spring waters before the onset of drought. Ultra early varieties are used. According to Donbass agronomists, Bellarosa is ideal. Also suitable varieties:
- Alyona;
- Lark;
- Impala;
- Olympus;
- Gull.
Harvesting of early potatoes begins in mid-June.
In the Nizhny Novgorod region
Since the climate in the region is cold, potatoes need to be prepared for planting three weeks in advance. It needs to be scattered into boxes and placed in a warm place for germination. To get an early harvest, you can plant several bushes with seedlings.
The methods and timing of planting are similar to the Urals and Siberia, because there are no big differences in climate.
For planting, it makes sense to choose early varieties, such as:
- Alyona;
- Lapis lazuli;
- Luck;
- Pomegranate.
Late varieties may not have time to ripen in a short growing season.
Video: growing potatoes in North-West Russia in difficult climatic conditions
Over several years of communicating with amateur potato growers, I had to answer many different questions. The most frequently asked questions were about planting patterns. What width is best for row spacing? How often should I place tubers in a row? These questions are very important for any crop, including potatoes. But very rarely one could hear a question about the depth of planting potatoes.
This is taken for granted. Well, what is there to think about? I dug with a shovel, and that’s the depth. This is what most potato growers do. But planting depth is also important. Correctly determined tuber planting depth ensures rapid germination of tubers. Plants develop from a large number stems and a more powerful root system, which contributes to the accumulation of crops and creates better conditions for caring for plantings and harvesting.
So, at what depth should tubers be planted?
to get maximum yield?
Many studies have been devoted to the issue of potato planting depth, but there is no consensus on what depth it is more appropriate to plant potatoes.
Planting depth can be from 5 to 15 cm from the top surface of the tuber to the soil surface. It depends on the timing of planting, moisture availability, soil structure and other factors:
— When planting early in unheated soil, the tuber should be closer to the surface, since the surface layer of the soil warms up earlier and the potatoes do not experience a lack of heat here.
— If the spring is dry and it is impossible to water the plants in the initial period, planting should be as deep as possible, otherwise the plants will develop slowly due to lack of moisture.
— On light sandy and sandy loam soils, planting can be deeper than on loamy and clay soils. This is due to the presence of air in the soil - sand and sandy loam are usually more aerated.
— When planting shallowly, a potato nest will form close to the soil surface, which will lead to a large number of yellowed tubers. Shallow planting of tubers makes subsequent hilling of potatoes necessary.
— When planting seed tubers deeply, it takes a lot of time for the sprouts to emerge to the surface. The faster the potatoes sprout, the larger the harvest will be. The number of plants suffering from rhizoctonia disease is increasing, causing the seedlings to become sparse and weakened. Planting too deep can lead to a decrease in yield; the yield of small tubers increases. Tubers often become malformed. Tubers and roots need a lot of air, but at depth there may not be enough of it. In addition, deep planting complicates harvesting potatoes.
In any case, you should try to plant the tubers at the same depth to ensure even seedlings. In the future, this will avoid the oppression of some potato plants by others.
In the south of the Omsk region, unique conditions are developing. Short growing season, spring-summer dryness and high temperatures July, heavy loams on my site make adjustments to the choice of potato planting depth.
The lack of spring moisture (small snow cover) and precipitation in summer requires deeper planting - the top layer of soil dries quickly. The presence of July heat (up to 40 degrees) also suggests deeper planting - when the soil heats above 28 degrees, the potatoes stop the filling of tubers.
On the other hand, deep planting is not desirable for us: the short growing season requires that the potatoes germinate earlier. On heavy loams, potatoes at depth produce a low yield of small and often ugly tubers - the soil is too dense and poorly aerated.
For the last 9 years I have not used plowing or digging of soil in my garden. All crops grow in narrow beds with mulched passages. At first, this only exacerbated the contradictions with the planting depth. The very planting and harvesting of potatoes disrupted the soil structure. Over time, I found a way to plant tubers without burying them in the soil more than 5 cm from bottom surface soil - used straw, hay, leaves, and other organic residues for mulch. He talked about this in his articles.
With my planting method, hilling the bushes becomes impossible, which reduces the potential yield of tubers. After all, stolons appear only on the white part of the stem, closed from light. Additional roots appear only in moist substrate. The question arose: how to increase the length of the stem below the soil surface without burying the tubers? And the answer turned out to be very simple. You just need to germinate the tubers to a sprout length of 2-3 cm and plant the seed with the sprouts facing down. More precisely, I position the tuber so that the sprouts are under the tuber and in maximum contact with the soil - sideways. Picture 1:
The reasons here are simple. The roots do not grow from the tuber, but from the sprouts. And since the tubers are not buried, then you need to make sure that the roots go into the soil faster. Beneath the loose, organic-rich layer is a dense, undug layer. The density of this layer ensures a powerful capillary rise of moisture from the underlying layers. The structure of this layer is not disturbed by the intervention of a shovel and it remains like a sponge, with an abundance of pores from worm passages and decomposed roots. These air-filled pores provide excellent aeration to the potato roots. Photo 1:

In addition, with such planting, the length of the etiolated (unpainted) section of the stems greatly increases. Roots and stolons are actively growing in this area. There is a kind of hilling effect, without hilling. Compare the length of the white area on the left tuber - normal planting, and on the right - sprouts down.

Moreover, the stolons are located in a loose substrate, which is very important for potatoes. In dense soil, up to 50% of stolons do not form tubers of normal size.
Another advantage of planting with sprouts down is that the bush grows wider than when planted with sprouts up. compare pictures 2 and 3. Rounding the mother tuber, the sprouts diverge to the sides. Some removal of trunks in the bush contributes to better illumination of seedlings, and therefore better photosynthesis - the development of plants in the initial, very important period.

Potatoes react to such planting high yield. Photo 2:

The photo shows a selection from the “Bars” hybrid population, the average yield per bush is 3 kg. Maximum - 5.6 kg. Per hundred square meters - 700 kg (17.5 bags) Digging potatoes with this planting is much easier than with deep planting with sprouts up - the tubers are all under mulch. Photo 9:

In photos 3, 4, 5 it is easy to see how the bush grew:

This photo shows a bush with a planting tuber and the harvest from it.

A view of the bush from above.

A look at the bush from below.
While exploring this technique, I simulated the development of potatoes planted with sprouts down. This can be seen in photographs 6, 7, 8:


The photo shows tubers with apical dominance. On such tubers, another unexpected effect of planting with sprouts down appeared - active tillering of the sprout. But it does not always appear. In my experiments this happened on 15% of tubers. Later, I found a way to make all the shoots bush. You just need to pinch the tip of the sprout. This technique allows you to obtain a multi-stemmed bush with the development of 1-2 sprouts at the top of the tuber (apical dominance). Moreover, the tubers in such bushes are all large. Compare in photo 3 the mother tuber and the harvest tubers. I explain this by the lack of competition within the bush. In a typical multi-stemmed bush, each stem is a separate plant. And they compete with each other for light and nutrient solutions. As a result, 1-2 large or many small tubers are formed on each plant stem. On a plant that has grown from a single, but branched underground sprout, the tubers are large. And due to the enlarged etiolated area of the stems, there are many tubers.
Anyone who decides to plant tubers with sprouts down must be prepared for the fact that potatoes will sprout later than from tubers planted with sprouts up. With a no-till planting method, like mine, this is not a problem. It takes a little longer to germinate, but you can plant it earlier - the top layer warms up faster, and I don’t need to bury it.
When planting with sprouts up, you can grow the same length of the underground part of the stems using hilling (compare Figures 4 and 5. In both figures, the length of the etiolated stem is the same). Planting with sprouts down allows you to avoid this labor-intensive operation that delays the development of potatoes.

If you want to get fresh tubers earlier, you can also use sprout-down planting. I also do this successfully. I place the tubers with sprouts 1-2 cm long, sprouts down, in a box and completely cover them with DRY sawdust. In a dry substrate, roots do not form, but the sprouts change the direction of growth and rise to the surface.
Whenever deciding whether to plant sprouts up or down when planting potato tubers, remember that the crop's tubers will form on branches called stolons that come out from the plant's stem.


