Most of us have a craving for beauty and comfort. In the courtyard of our own house, in the country house and in the garden, we strive to surround ourselves with charming flower beds, lay out paths that invite us to walk, and cannot do without unusual and cheerful figures. Gypsum is one of those materials that can be easily transformed by hardworking hands into a wonderful garden decoration.
Features of the material
Gypsum or alabaster has a number of properties that predetermine its use in construction and medicine. It is also great for making garden figurines with your own hands. Even large sculptures are made from alabaster. The use of forms allows you to accurately copy the most complex volumetric figures. Working with the material is not physically difficult, so many women are interested in creating art with plaster. Professionals have already made a considerable number of alabaster crafts for the garden.
Plaster figurines for the garden for every tasteIt should not be forgotten that alabaster is a rather fragile material that is afraid of moisture. It is better not to test products made of alabaster for strength. They must be protected from water with paints and varnishes. In the autumn and winter, plaster figurines are stored in a dry room.
The most important thing is that to make figurines from such material, molds are needed.
Most often, garden figurines of animals and people are cast from alabaster. Less often - objects of inanimate nature. We invite you to evaluate the photos of animals that you can make from plaster. Of course, you will have to come up with, purchase or make forms for them.

 A successful composition makes the squirrel come alive
 Another squirrel became interested in mushrooms
  This forest is home to foxes, hedgehogs and mushrooms
 The bear is made of plaster, but the honey is real?
  The pig is bored alone in the pen
  Plaster pots should be well insulated from moisture
 Some are just getting acquainted, others already have an heir
 In order not to make a mistake in choosing an alabaster figurine that you are ready to make with your own hands, it is useful to find a place in the garden for the future figurine and imagine the general plot of the composition. We recommend starting with a simpler figure.
Using this pattern you can make any figurine from alabaster
First of all, to cast a plaster craft, you will need a mold. A budget option is to use plastic bottles, old toys, dishes, etc. Of course, the list of possibilities is limited and you will have to rack your brains to find suitable material. It is much easier to use ready-made children's molds for plaster or sand. Large silicone molds that are used in production are too expensive. If you really want, you can make a silicone mold yourself, as the following video describes.
The material has limited strength and relatively large crafts are reinforced with mesh or wire. To save material and reduce weight, plastic containers are placed inside the figure. A special plaster intended for casting sculptures is stronger than alabaster and building plaster. To increase strength, PVA glue can be added to ordinary alabaster.
For ease of manufacturing and painting, figures are often made in the form of separate parts. The parts of the craft are fastened together with glue or alabaster solution.
To make it easier to remove the finished figure from the mold, it can be coated with a water solution of liquid soap and vegetable oil. There should be twice as much soap as oil. The resulting mixture is diluted with five portions of water.
The dry material is diluted to the state of liquid sour cream and poured into the mold. The solution hardens in a matter of minutes. A chemical reaction is accompanied by the release of heat. During casting, air voids may form. In production conditions, the issue is resolved by using a vibration stand. When working with your own hands, you need to carefully pour the solution, and the voids can be corrected with putty or alabaster solution.
 You will have to work with such a figure for a long time
 A small figurine will be ready for further work in half an hour. A large casting should dry for several days in a dry place and out of the sun. You can continue to work with the craft when your hand does not feel moisture. It is easy to make drawings on the surface of the figure. For these purposes, use a knife, awl, or needle.
To protect against moisture and improve adhesion with paint, the craft is primed. You can use construction soil or half-diluted PVA glue. Professionals cover plaster sculptures with several layers of drying oil heated in a water bath. After the surface has brightened, you can continue working.
The surface of the figure is successively decorated with paints. Water-based paints do not adhere to surfaces coated with drying oil. Oil, pentaphthalic, and alkyd enamels are suitable. Final processing is carried out with drying oil, wax or varnish. The figurine can be decorated with all kinds of decorative elements: buttons, glass, acorns, pine cones, and more.
In practice, the same technology can be used to cast figures from cement mortar. They will be durable and will not be afraid of moisture. However, cement-based mortar hardens slowly, and it will be difficult to make relief designs on the surface.

 This is how a plant pot in the shape of a swan is made from plaster
 Crafts from plaster can not only be cast, but also sculpted. In this case, it is necessary to make a frame onto which parts of the craft are gradually applied. Prepare and apply the gypsum solution in small portions. It is better to do the work with gloves. It is convenient to use a plaster medical bandage. Pieces of bandage are soaked in water and applied to the figure. It is necessary to smooth out uneven areas. The sinks are sealed with alabaster mortar.
Note that stucco figures are often made from cement mortar, including the addition of gypsum. This is a separate article.
Master class on making a charming mushroom
The mushroom seemed to me the most suitable craft for decorating the site, which can be cast from plaster. Forms for it are easy to provide. The mushroom will fit perfectly in the garden. To make it you will need a very short list of tools.

 Let's take a step-by-step look at the figurine making master class:


 Upon completion of the work, I came to the conclusion: working with the material is easy and simple. The most important thing is to choose the appropriate form. I recommend that you try to build your own garden figurine. Let the video help you with your work.
You can watch it), and now lesson 2 and I will tell and show in the master class how to cast a silicone mold for a future plaster figurine. Looking ahead again, I will say that perhaps the most difficult thing in this whole process is all the preparations for casting a silicone mold: assembling the frame (box), lubrication, etc., but the casting itself is not very difficult.
So, to cast a silicone mold I needed:
- 1 liter of silicone
- pieces of plywood (for assembling the box)
- any dishwashing detergent
- small screws
- hacksaw
First, I measured and cut off the bottom of the future box; it should be 1 cm larger on all sides than the width of the figure. Next, I sawed off the four side walls with a hacksaw, attached them to the bottom with self-tapping screws, and the result was a box without a top. By the way, when sawing, place the plasticine blank in the box again so that there is not a very small distance between the figure and the wall. Ideally – 1-1.5 cm.
When the box was ready, I smeared all its walls and the owl itself with dishwashing liquid. This is done so that after the silicone dries, it easily moves away from the walls of the plywood and from the figure itself. There is a special release agent for silicone, but I didn't have it, so I replaced it with dishwashing detergent (in this case AOC). You can also use liquid soap or any soap composition. In general, everything inside where the silicone will come into contact should be lubricated.
Then I screwed a self-tapping screw all the way into the center of the bottom from the front side, and placed the owl on the self-tapping screw so that when pouring the silicone it would not float up. Next, I diluted the silicone and carefully, trying not to form bubbles, poured it into the prepared box with the figurine. Bubbles will appear on the silicone one way or another, because when you stir, oxygen enters the silicone. But we need to try to have fewer of them.
The hardening time of silicone varies, depending on the brand and its Shore density. It took about 40 minutes for me to freeze. Then I carefully unscrewed all the screws, removed the plywood and removed the finished silicone mold. The owl was still in shape, so I pulled it out. This is how you can make a silicone mold for a figurine at home.
Well, now the most interesting part - casting a plaster figurine using a silicone mold. For 1 liter of water I took 700-800 g of molding plaster, stirred until smooth and poured into a silicone mold. Hardening time is approximately 20-30 minutes (depending on the freshness of the gypsum). The frozen plaster owl was removed from the silicone mold. This is the principle used to make plaster figurines with your own hands. In the last lesson I’ll tell you how to imitate old bronze. 


The beauty of the garden depends on how we take care of it: how exactly the flowers and trees will be planted, what kind of furniture will be in the garden, what kind of fence, what kind of figures decorate the flower beds and paths.
In this article we will tell you how to make a very simple but beautiful one from plaster with your own hands.

To make a garden figurine from plaster we will need:

- Sculpted gypsum at least 500g (it can be replaced with a cement mixture, it will be even more durable)
- PVA construction glue
- acrylic paints for working on glass and ceramics
- tassels
- compass
- pencil
- a set of cutters for wood carving (can be replaced with a large needle or a stationery knife)
- cellophane cling film
- stationery knife
- empty plastic bottle, suitable shape
- 2 cups: one for pouring the base, the other for the mushroom cap
- decorative elements for decoration: figures, beads, artificial decorative flowers or leaves, molds for creating plaster figures
- waterproof glue for reliable fixation of decorative elements
- sunflower oil
Making a leg for a garden figure
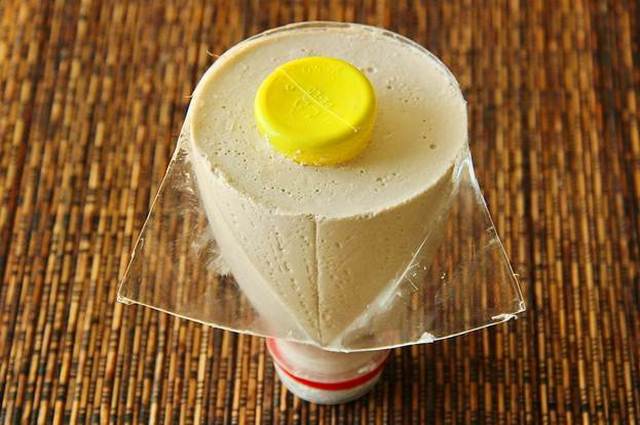
From an empty plastic bottle, for example a milk bottle, we cut off the neck, which will serve as a form for us to create a mushroom stem.

To make it easier to remove frozen sculptural plaster from the mold, the walls of the bottle can be coated with a solution of grated soap, vegetable oil and water in the ratio: 2:1:7, respectively.
Grate the soap on a fine grater and pour it into a jar.

Pour vegetable oil and water there. Mix everything well and apply the emulsion to the walls of the bottle with a brush.

Then we dilute the sculptural plaster (not all of it, but only the part needed to make the leg) in the ratio indicated on the package.


Pour the gypsum solution into the mold and leave to harden. To reduce the cost of plaster, the leg can be made hollow. To do this, select a plastic bottle that is suitable in size and shape and insert it into the hardening plaster. It is important that the diameter of the neck of the bottle being inserted is much smaller than the diameter of the neck of the mold.


To prevent the bottle from floating in the liquid plaster, press it down with any convenient press.

The plaster sets quickly. After 4-6 minutes hardening will be noticeable, after 30-40 minutes you can continue working with the figure.
We cut the mold with a stationery knife and take out the plaster blank from there. We cut off the excess part of the plastic bottle that we inserted to reduce the consumption of plaster.


Making a hat for a garden figure
To make a mushroom cap, we take a cup of a suitable shape and cover its surface with cling film. We try to apply the film as tightly as possible to the cup and leave as few folds as possible.

We dilute the next portion of gypsum needed to create the cap and pour it into a cup. We insert the leg into the hardening plaster of the cap and leave for 30-40 minutes.

Making a platform for a garden figure
When the mushroom hardens, we make a platform for the figure. To do this, select a cup that is suitable in shape and size, cover it with cling film or emulsion for lubrication.
We dilute the plaster and pour it into a cup. The stem of the mushroom can be immersed there, but we recommend making it removable, so it will be more convenient to work with the design of the mushroom. To do this, cover the mushroom stem with cellophane cling film and immerse it in plaster in a cup.

After 30-40 minutes we take everything out.
If you want to use flowers, leaves, or figures, also made of plaster, in your design, fill them in the same way and leave them to harden.


The finished plaster figurine must be thoroughly dried before painting. We put it in a warm place for a day or even two.

The moment of design can be spontaneous and born right during the process, or it can be thoughtful and drawn on paper. It is not necessary to draw everything in detail; you can sketch out the key points.

When the sketch is ready, we begin to design the figure.
Using a simple pencil, draw everything you want to see on the mushroom.

Then we add volume to the sketch using wood cutting tools or a sharp large needle.


To ensure that the paint adheres better and costs less, the mushroom needs to be primed. This can be done with special primer mixtures, or you can simply dilute PVA construction adhesive with water in a ratio of 1 to 2. One part PVA and two parts water.

Apply the primer to the figure with a brush and wait a couple of hours until the mixture dries well.

Then we paint the fungus according to the intended and cut out pattern.

Let the paints dry well and cover the top securely with varnish. We apply the varnish in several layers, leaving not a single unpainted area. After applying each layer, let the varnish dry thoroughly. We fix the design details in the right places using moisture-resistant glue.

The figurine is ready. Now you can fill your garden with mushrooms for every taste and color!


Having your own garden is a real pleasure for its owners, a cozy corner in which you can relax not only with your body, but also with your soul. The purest air, the aroma of flowers, the gentle rays of the sun, a complete feeling of harmony and peace create a truly heavenly pleasure.
Creating a unique atmosphere in your own garden is a completely justified desire of every gardener. Jewelry created with your own hands will be the most original and will be able to create a truly individual exterior that would fully reveal the owner’s inner world.
In his mind, the gardener certainly and more than once went through the ways and elements that would transform his garden: flower beds, fountains, ceramic or plaster figures for the garden, miniature artificial ponds and much more.
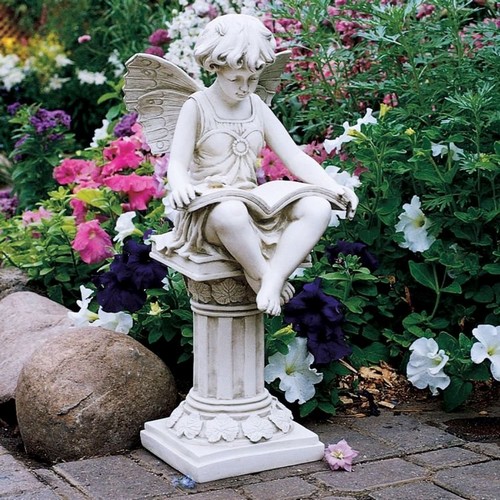
Garden sculptures

Gypsum figurines for the garden are simply a magnificent element of the landscape. The tradition of placing fairy-tale inhabitants and unusual sculptures in the garden came to us from Western culture. And every day this tradition is becoming more and more popular among domestic gardeners.
As a rule, these figures are gnomes, boletus mushrooms, forest dwellers and other fairy-tale characters. The purchased figures are all bright and noticeable.
It’s a completely different matter when the garden contains sculptures created by one’s own hand, which are individual and unique.
Preparation

Before, armed with imagination, appropriate materials and tools, you begin the creative process, it is necessary to assess and analyze the general style and design of the territory. This assessment will allow you to determine which do-it-yourself gypsum garden figurines will be appropriate and suitable, as well as how many of them will be sufficient.
Note!
It is important to determine not only the number of sculptures, but also their style and overall dimensions.
An excessively large number of even beautiful and highly artistic elements can turn your territory into a standard of bad taste.
If you refuse to plan, you can easily get bogged down in decoration, and your garden will always be unfinished due to the fact that you will follow more and more new impulses of imagination, and will not have a clear idea of the final result. It is for this reason that you should first develop a sketch plan, purchase the necessary materials and tools, and only then begin work.
Materials and tools

Small architectural sculptures will fit perfectly on a country plot anywhere:
- On ;
- At the well;
- Under a bush;
- At the entrance, etc.
On the modern market, garden sculptures made of natural stone, ceramics, scrap materials, plaster or even polyurethane foam are becoming increasingly popular.
But if we talk about how to create figurines with your own hands, then gypsum is often chosen, the price of which is low, working with it is simple and straightforward, and the finished products have enviable durability.
To create a garden figure from plaster with your own hands, you will need the following set of materials and tools:
- Sculptural gypsum, the amount of which directly depends on the size of the final product. For a small figurine, only half a kilogram of plaster is enough;
Note!
If necessary, gypsum can be replaced with ordinary cement mortar, which has greater durability.
- PVA construction glue;
- Colored acrylic paints;
- Waterproof adhesive composition necessary for fixing decorative elements on the surface of the sculpture;
- Decorative elements, which can include beads, pebbles, glass, etc.;
- Compass;
- Wood cutters or large gypsy needle;
- Stationery knife;
- Soft food film;
- Plain soap;
- Sunflower oil;
- Pure water;
- Molds for plaster, which will serve as cups of various shapes and volumes, and even plastic bottles.
Once everything you need has been collected, you can begin the creative process of creation.
Creating a garden sculpture
As an example, we will consider step-by-step instructions for creating a gypsum mushroom, which will become a real decoration for an area decorated in any garden style.
Creating the stem of the future mushroom
As you can understand, do-it-yourself plaster figurines for the garden such as mushrooms, like a real mushroom, will consist of two elements:
- Leg;
- Hat.
To create a leg, proceed as follows:
- First you need to prepare the neck of a plastic bottle;
- It is imperative to ensure that the created element easily moves away from the form. Why rub soap into a separate container and mix with water and sunflower oil in a ratio of 2 to 7 to 1;

- Using a brush, lubricate the mold and move on to working with plaster;
- The packaging with the purchased gypsum powder will certainly contain instructions for creating a building mixture indicating the proportions. Using this guide, mix the plaster;
Note!
You should not dilute all the plaster at once, because it sets quite quickly.
- Stir the solution thoroughly and pour it into the prepared form, into which a small plastic bottle should be placed in advance so that the stem is hollow, this will save the solution and reduce the weight of the product;
- As soon as the created solution has set, this is about 30 minutes, use a knife to cut the bottle shape and carefully remove the mushroom stem;
Construction of the cap
The shape for the hat can be an ordinary kitchen bowl or a fairly deep plate. The chosen form must be covered with cling film, or greased with the same mixture of water, soap and oil.
After this preparation, fill the mold with plaster. After the mixture begins to set, this is about 10-15 minutes, insert a leg in the center of the cap and leave the product until the solution has completely hardened.
Mushroom base
Once the gypsum mushroom has completely hardened, it will be necessary to take care of the base for it.
- The shape for the base can be a small basin or kitchen bowl;
- We treat the mold with film or soap solution;
- Pour in the prepared gypsum solution;
- After 10 minutes, wrap the mushroom stem in film and lower it into the base in the center;
- After the solution has completely hardened, remove the mushroom.

Figurine decoration
The role of additional elements and decorations for this figurine can be leaves, flowers and bugs, also created from plaster. You can make them using specialized small molds.
When the parts are ready, they need to be dried thoroughly, for which they are laid out in a sunny area.

Note!
In sunny weather, 12 hours is enough for the figures to dry, and the next stage of work can begin.
- While the plaster mushroom and figures are hardening, think about how you will decorate it, or better yet, create a sketch on paper;
- When the figure has dried, draw a sketch directly onto its surface using a simple pencil;
- Lines created with a pencil must be made into relief using cutters or a needle;
- Treat the sculpture with primer, this will reduce paint consumption. The primer can be a solution consisting of PVA construction adhesive and water in a ratio of 1 to 2. This primer will harden in about 2 hours;

- Now the final stage is coloring. According to the sketch, the mushroom is painted, after which we wait until the paint dries;
- We treat the painted figure with colorless varnish, carefully leaving no untreated areas.
Note!
If the sculpture is not carefully varnished, at the end of the season it will lose its attractiveness, because... the paint will be washed off by precipitation.
- Now all that remains is to glue the finished mushroom to the base and install the figure in the garden.
Finally

As you yourself could understand from all of the above, creating garden figures from plaster with your own hands is not so difficult, and such creativity does not take very much time. Children can be involved in this process, and you can bond with them, develop their creativity and decorate the garden at the same time.
And the video in this article will reveal to you many more secrets of decorating a garden using sculptural plaster.
Gypsum is flexible and environmentally friendly, so fakes made from it are increasingly becoming fashionable among handicrafts.
The softness and flexibility of the material allows you to make realistic figures, cut out small details and patterns, which makes plaster crafts excellent decorations for your apartment, garden, and vegetable garden.

Crafts made from plaster are attractive due to their simplicity and accessibility, and master classes on such creativity can be shown to young children.

Moreover, in the process the child improves his skills in working with bulk materials, repeats or studies colors, and develops fine motor skills.
Gypsum variety
Frozen gypsum is strong and hard, so crafts made from it are practical and functional. Thus, plaster vases, flower pots, boxes, and flower pots are popular.

It’s easy to make DIY garden decorations from plaster, such as figurines of gnomes, mushrooms, flamingos, hares, artificial flowers, and decorative hatches.

Step 1 – Turn on your imagination
There are a great many options for gypsum crafts for the garden, vegetable garden or home interior, so you need to focus on a specific area.

For example, if you have a pond, then decorate it with a frog with an arrow in its mouth, the hummock can be supplemented with a miniature window and a gnome, and children and grandchildren will be delighted by their favorite fairy-tale characters hidden among the flower beds and garden tools.

Step 2 – Select a shape
If your choice fell on standard swans or gnomes, then any suitable shape, plastic, wood, metal or silicone, can be purchased in the store. For thrifty or original craftsmen, there is the opportunity to make the base with your own hands.
To do this, you need to cut out a certain texture from the listed materials or make a mold from plaster: dilute the solution in a container, lower the object requiring a copy into it, let the plaster harden and repeat the procedure for the other side of the original figure.

The resulting halves are varnished, glued together and subsequently used for the next filling of the solution.
True, it is better to use elastic silicone molds that do not require lubrication and do not damage the fake during separation of the model.

You can make a silicone base yourself in the same way as a plaster base.

Step 3 – Prepare the solution
All that is useful for needlework is plaster purchased at the pharmacy, plain water, a container for diluting it and a mold for casting the figure.

To dilute plaster for crafts, pour powder into a medium-sized basin or large bowl, add water and stir. There are no special proportions, but you need to focus on the consistency of liquid sour cream.

If your figurine is intended to be one-color, then when making the solution, you can add paint to the water and only then mix the plaster.
The amount of gypsum must be thought out in advance, since it hardens quickly, and if there is a shortage of material, it will be impossible to make a new batch in time. It is better to dilute more solution and use it immediately.

Note!

Step 4 – Decorate the craft
An ordinary gray figurine will not decorate your garden, so it is better to paint it thoroughly. You can look for inspiration and ideas among photographs of plaster crafts.

Before applying paint, the product is primed with wood glue or PVA, and then varnished to protect it from rain, wind, snow, sunlight and other external influences.

Step 5 – Deciding on a location
You can install the figure of a stork or a cow along the garden path or on the sides of the gazebo, the main thing is that they fit well into the overall atmosphere.

As a warm-up, you can bring to life the following idea: make a mold in the form of a large sole, a footprint, or purchase a similar one in a store, cast several dozen of these crafts and lay out paths in the garden or vegetable garden with them.

When arranging figures around your garden plot, you should avoid their excessive accumulation and be guided by your own taste.
However, it is better to place gnomes and flamingos in open areas, place animals in bushes or flowers, and place large figures - houses, fountains, flowerpots - in the middle of flower beds or near the house.
Note!


Creating with plaster is fun, easy and, most importantly, safe. All this makes this type of needlework interesting and exciting for children and adults.

Photos of plaster crafts


Note!


