October 10, 2017 17:53
As Billie Lurk in Dishonored: Death of the Outsider, you'll occasionally come across other characters' safes, which may contain valuables such as amulets or coins. In this article, we will tell you where the safes are located, where to look for the code for the safes, and what you can find in them.
Mission 1 "The Last Stand"
Safe in Bookmaker's apartment
During the first mission, “The Last Stand,” you will encounter only one safe. He is in the bookmaker's apartment. You can get into it in several ways. The first is to climb through the windows. When you arrive in the North Campo Seta area at the carriage station and reach the stairs leading down, the office windows will be at your eye level. Climb through the pipes on the left onto the balcony, and then through the open window and the safe will be in front of you.
The second way is to enter the bookmaker's apartment from the main door. It is located in the house opposite the Albarka bathhouse, and the key to it lies in a bucket standing on the bottom shelf of the rack near the entrance to the apartment. This is written in a note hanging on the belt of the bookmaker, whom you will find in the Albarka bathhouse. The same note indicates where to look for the code to the safe. To open the safe, look at the bookshelf above the bookmaker's table and count the books. This is the combination for the safe. Inside you will find a decent amount of coins and Sokolov's elixir, which restores health.

Mission 2 "Following the Ink Trail"
Shan Yun's Safe
Shan Yun's house, where you need to go on assignment, is located next to the Spector club. There are several ways to get inside. The first is to find out the secret knock of Shan Yun's beloved, Mrs. Eolina Rey. To do this, you will have to visit her apartment above the flower shop, which is located opposite the Red Camellia beauty salon, and read the letter lying on Eolina’s desktop. The second way is to go through the passage leading from Spector's club straight to Shan Yun's house. The passage is located on the top floor of the club.
Shan Yun's safe is located on the third floor of the house in the office-library. The safe opens with a musical audiogram featuring the owner's song. You will find it in one of the display cases in the hall with Shan Yun's private collection, which is located on the second floor. The door there is not locked, but there is a security system on the floor.

The protective system can be disabled by removing the blubber tank in the dumbwaiter room next door. But here too you will need a key to the room. It can be obtained from Shan Yun's desk, which is located in his bedroom on the third floor. Or you can enter the room by taking the dumbwaiter from the first floor or descending from the third.

Having completed all these steps, feel free to take the audiogram “Undo your braids, Gloriana” from the display case and run to the audiograph, which is located not far from the safe. Play this song on it and you can take all the contents of the safe. Inside you will find: Shan Yun's key, which is necessary for the task, a bone amulet (read about where to look for the rest), as well as charges and coins.
Safe in the journalist's office
If you carefully examined Ivan Jacobi's office, you should have found a letter on the table about the journalist Christopher George. After reading it, you will activate an additional task related to the evidence against Jacobi, which you will find behind the painting in Jacobi’s office. Take what you found to the journalist, and in return he will tell you the code to his safe installed in his office. You will find coins in it.

Mission 3 "Bank Robbery"
Safes in the bank archives
On the -1st floor of the courtyard of the Michaels Loans and Deposits bank there is an archive and several safes of the bank's clients. You can open three of them, belonging to Christopher George, Dr. Galvani and Morgan Yu (a cool Easter egg for the game Prey). On the way to the safes you should beware of the sentry soldier and the electrical protection on the floor. Both the soldier and the defense can be bypassed at the top.

Christopher George safe code
The code to Christopher George's safe can be found in the note "In the event of my death." You will find it in the bank employee's office, located on the top floor near the conference room. If you entered the bank from the roof, then simply go down to the top floor and go to the end. The note lies crumpled on the floor near the trash can. My note said combination 379, but it's likely yours might be different. Unfortunately, you won't find anything valuable inside the safe.

Morgan Yu safe code
Opening this safe is necessary to complete the Rags to Riches and Rags Again job, as you need to steal the gem from it. The code for the safe is encrypted in the task for the contract itself. The combination of numbers matches the number of coins the owner had when he arrived in Karnaca. My number is 315, but perhaps it changes for each player. If you have the same, then write about it in the comments to this article. You will receive 500 coins for the contents of the safe, as you complete the contract.
Code to Dr. Galvani's safe
On the ground floor of the bank's courtyard, where the guard walks around and there is a light wall, there is a work area for bank employees with numerous tables. In this area there is a separate office located directly behind the storage shaft, in which on the table you will find a note "Announcement to Employees about Dr. Galvani." This note will contain a key clue to the digital combination from Galvani's safe - this is the most important date in his life. You can find out what this date is from the book “Memoirs of Doctor Galvani,” which quite often comes across in Upper Kyria. It indicates the date - the 28th of the cold month. Considering that the cold month is the 7th, the code for the safe is 287. In Dr. Galvani's safe you will find 3 gold bars, which equals 450 coins.

Safes in a bank vault
On the task “Bank Robbery” you need to rob a bank vault, for which you only need to gain access to it, and you already have the keys for the required safe, found in the previous mission. But there are still safes in the vault that can be opened. To begin with, your assignment requires you to infiltrate the storage control center and move the storage elevator to the director’s office on the third floor or to the archive on the minus first floor. Next, you need a vault key. You will find it in Dolores Michaels' hiding place, in her office. It is hidden behind a huge painting and is opened by a button located on the desk. It lies next to the amulet.

To open all the vault safes, you need to set a 15-digit code, and all safes will open at the same time. You can find the first part of the sequence of numbers in the back room on the third floor of the main part of the bank, that is, the one you came to initially, not the courtyard. The clue is written on the board. It follows from it that each subsequent number is the sum of the previous two, but do not forget that there are 6 safes, which means the sequence must be 18 digits, three of which we must skip, since the 4th safe is opened with keys. We have 9 digits for the first three safes: 0, 1, 1, 2, 3, 5, 8, 13, and continue them for the rest: 21, 34, 55, 89, 1(44) - we won’t need the last two digits . As a result, we get the following codes for the bank vault safes:
- 1 safe: 011
- 2 safe: 235
- 3 safe: 813
- 4 safe: opens with keys (skip 3 digits)
- 5 safe: 455
- 6 safe: 891
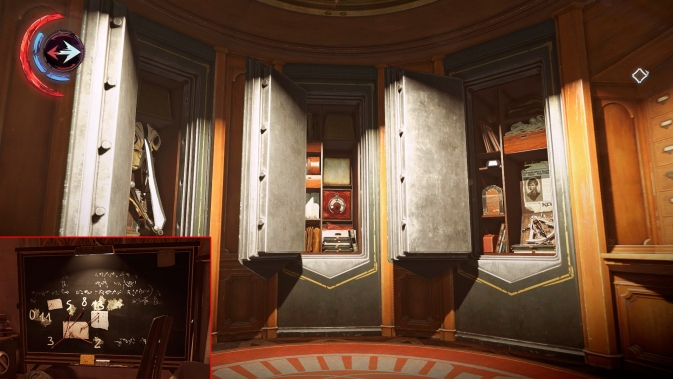
Now the safes are open and all their contents are yours. What will you find in them:
- 1 safe belongs to Jindosh, who created the sentry soldiers, inside you will find a note with a voice code that allows you to subdue the sentry soldiers.
- 2nd safe: 30 coins and a black amulet. Where to find the rest of the amulets, read here.
- 3 safe: 150 coins
- 5 safe: 90 coins
- 6 safe: 60 coins.
Mission 5 "There's a Hole in the World"
Safe Malchiodi
Malchiodi's room is located in the Northern Shindeyri Mine in the residential section, which is located just before you enter the library. The room is locked, so you can get there only after you penetrate into the Abyss through the Eye of the Dead God. The first thing you will see in the Abyss will be the corpse of Malchiodi, from whom you must take the key to his room.
I like 14
We continue our “Workshop” section, and today I will tell you how to open a safe if you have forgotten your password. This is a fairly common and annoying situation - the user closes the safe and forgets the code combination. This can happen in an office at work, a hotel room, or at home. No one is immune from this.
The first step is to determine the model of the safe. A warranty card, instructions for the lock, and a safe passport can help with this. Even if you ultimately fail to open the lock yourself, this information will be useful to an emergency opening specialist.
If the safe was purchased a long time ago, and the warranty period has expired and the passport has been thrown away, try to find the purchase documents, order number, and store address. Perhaps the seller will help you identify your safe, send you instructions for the lock, or tell you the current customer service phone number.
So, let's start opening the safe - our actions will be determined primarily by the type of lock, and secondly by its design.
How to open a combination mechanical lock.
This lock has a characteristic rotary handle with a dial (a metal ring with marked marks), with which the code combination is dialed. This is what he looks like.

Such locks either provide the ability to change the code or not. In the second case, the code combination is set at the factory and never changes again. You can find out the factory code of such a lock by the serial number by contacting the service department or directly to the factory. The serial number and code combination are indicated in the passport or operating instructions for the safe. Here's an example.
If you have a combination lock with a changeable code, then the problem is more serious. Try looking at the instructions, maybe you didn’t bother to change the preset combination. Then you can use it. If not, you will have to call an emergency opening service.
How to open a combination electronic lock.
A characteristic feature of these locks is a push-button keyboard for entering a code combination. Light and sound alarms simplify programming and operation of the lock. Regular batteries are used for power supply. This is what these castles look like.

Some models are equipped with an emergency opening function, which allows you to open the safe without a code using a special “master key”. In addition, there may be a button on the inside of the door to reset the current code.

Perhaps your lock supports this function, but you didn’t know. Check the instructions to see if this is true. If so, look for the master key.
If the lock does not support the emergency opening function or the master key is lost (it was prudently locked in the safe), try dialing the factory master code specified in the instructions - it is possible that you forgot to change it after purchasing the safe. Usually this is a primitive code, like 1-2-3-4-5-6. If the master code was nevertheless changed and subsequently lost, you will have to call the service - without the help of a specialist it will not be possible to carefully open the safe.
If you have a cheap Chinese safe, then it’s not worth the candle. You can try to figure it out yourself, there is a very high probability that you will succeed:
Professional emergency opening services.
If none of the above helps, you will have to seek help from professionals. It is better to entrust emergency opening of your safe to a specialized organization with a good reputation. Here they can provide not only professional service, but also confidentiality. If you don’t know these, contact the store where you purchased the safe.

When talking to a specialist, be prepared to tell him the brand and model name of your safe, and the type of lock. The more complete the information, the faster and more accurately he will be able to decide on the opening procedure, the necessary tools, and the cost of the work.
It is very good if the master has already opened safes similar to yours before. Ideally, the safe is opened without damage, the functionality of the old lock is restored or replaced with an exactly the same new one.
- do not store the operating instructions and the safe passport in the safe - you will really miss them when you forget the code combination. The master key also does not need to be stored in a safe.
- do not throw away the documents on the purchase of the safe, they will be confirmation for the service department that you are the legal owner of the safe. They can help identify the safe.
— if you are an “advanced” PC user, you can use password managers. For example, KeePass.
- find a decent organization for emergency opening, write down contacts in the phone book. This is guaranteed to help open any locked doors - safe, apartment, car.
In Dishonored: Death of the Outsider, most safes containing valuable items have a combination lock. Some doors will also require you to enter the correct number to pass through. The difficulty is that some of these codes are randomized with each playthrough and will be different for each player. As in previous games in the series, clues can be found somewhere nearby. In our guide we will tell you exactly where to look.
All safe codes in Dishonored Death of the Outsider:
Before you go headlong searching for clues, we strongly recommend that you try the numbers indicated in the guide. If the code stays the same, you'll save a ton of time.
Task 1 - Last fight
- Safe in the bookmaker's apartment- The only safe in this mission can be found in the bookmaker's apartment across the street from the Albarca Baths. You can get inside in two ways: through the window above the two guards near the docks or through the main entrance from the bathhouses, after finding the key in the bucket that is in the closet near the front door. To find a clue to the code for the safe, you will have to deal with the bookmaker himself in the baths. A note from his pocket will tell you that to get the code you should count the books above the table. And although the first thing you will notice is the numbers on the board, this is not at all what you need. Just count the number of books on the shelf. It is divided into sections, each of which will give you one number. We got 451.
Task 2 - Following the ink trail
- Black market door- the first combination lock you come across unlocks the back entrance of the black market. To get inside, break the Report all theft floor sign, which is located to the right of the notice board. So you will see a grate through which you can crawl through with the help of foresight. Move forward until you're in the room, then stay to the right. There will be a board hanging on the wall next to the door, on which the code is written in large numbers.
Safe in Christopher George's office- the office is located on the left side of the courtyard of the Dolores Michaels Bank. You can get inside through the balcony on the second floor. Talk to the man inside and you will receive the additional mission Unmask Ivin Jacobi. Complete this task, return to George and he himself will give you the code to the safe.
Safe in Shan Yun's house- you will find it during the story mission. To open the safe, you will need a special audiograph, which can be found on the second floor of the house. You need a room with an electrified floor, it's the only one there, so you can't go wrong. In order not to die the death of the brave, the floor must first be turned off. To do this, you will have to go down to the kitchen on the first floor and take the key to the room with the dumbwaiter from one of the servants. Use it to move to the second floor and remove the blubber tank that powers the floor. Take the audiograph and go open the safe.
Task 3 - Bank robbery
All safes in this mission are located directly inside the bank. The first three you will find in the basement vault Archives and Safes. There are six more in the main vault, one of which is opened with two keys as part of the main story.
- Christopher George's Safe- you can find the code on a crumpled note on the floor next to Ruby Campos' desk on the third floor. The note is called In the event of my death. It looks like this code doesn't change. We had the numbers 379.
Morgan Yu's safe- in the contract From rags to riches and back to rags again, you will be asked to go to the bank vault to pick up a valuable stone. The contract description says 315 coins, which will serve as the combination to the safe. If you've played Prey, you've probably noticed a familiar reference.
Safe Luigi Galvani- there are two separate documents that serve as the key to this riddle. A note to staff about Dr. Galvani indicates that his lock code is the most important day of his life. In Dr. Galvani's memoirs, he recounts his meeting with the infamous Anton Sokolov on the 28th day of the Month of High Cold. We didn’t really understand the part about the month, so we entered the first two digits and found the last one by searching. It turned out to be 287.
Safes in the main vault- they have constant codes based on the Fibonacci sequence. From left to right you need to enter the following numbers: 011 - 235 - 813 - 455 - 891.
Task 5 - There is a gaping hole in the world
- Safe Malchiodi- This safe will be marked as an optional objective near the end of the fifth mission after you find the corpse of the same name. Next to the safe you will see a wall painted with various numbers and symbols. You need those that together make up the Alien sign. We got 962.
Safes in Dishonored serve as an additional source of money and expensive things. Coins in the game are used to buy ammunition, elixirs, potions, upgrades for weapons and equipment, which Pierrot makes in his workshop next to the Dog Pit pub. The more valuable the contents of the safe, the more difficult it is to get to it. The safes are reliably protected from burglary by combination locks. The only way to quickly open the lock is to find out the secret three-digit code, otherwise you will have to go through the combinations yourself, counting on chance or luck. Almost every safe in Dishonored has a clue that is carefully hidden within the location. Most often, clues are found in notes, books, characters, but can also be found, for example, on walls. If there is no great desire to scrutinize the game world, crack safes in Dishonored You can do it without prompts, by immediately entering the exact lock codes. The result will not change, but it will save time. The only exception to the rule is the art dealer's safe in Dunwall's Wine District, where the correct combination is constantly changing. This was done, apparently, due to the fact that he is connected with a secondary task from Slackjov. If none of the codes match, you should wait until you meet the merchant in the silver room on the second floor of the Golden Cat, when Corvo goes to save Emily. A couple of electric shocks will make the stubborn person more accommodating, and the secret will come true.
There are no master keys or devices for breaking into safes or doors in Dishonored. All actions occur in manual mode: entering numbers from a combination - the [F] key, moving around the lock - moving the mouse. There is no need to look for mined jewelry in your inventory, they are immediately converted into coins. You can return to skipped safes within the same level, but not between chapters, since the plot of the game directly depends on the actions taken and decisions made, so it’s better to crack safes right away.
Hints and codes for safes in Dishonored:
- Catacombs(Innocently convicted):
- Safe location: in the next compartment after receiving the crossbow and reading the note to the "Lord Protector" on the way to Samuel.
- Hint location: "Jelly's Share" note - lying on the chair next to the safe. The correct combination is written on the wall behind the safe behind the empty whiskey bottles.
- Contents of the safe: Sokolov's healing elixir, a case for jewelry of the Moray family.
- Safe code: 451 .
- Wine Quarter(Supreme Overseer):
- Safe location: on the second floor of Dr. Galvani's office, where Old Rags sends for rat guts.
- Hint Location: On the board with sketches of a whale on the third floor of the house. The key to the laboratory can be obtained from the city guard sergeant.
- Safe code: 287 .
- Wine Quarter(Supreme Overseer):
- Door location: in the kennel under the High Overseer's office.
- Hint location: in the note on the bed behind the wolfhound cages.
- Safe contents: wallet with 50 coins, mounting tool, Sokolov's healing elixir, Pierrot's spiritual balm, darts.
- Safe code: 217 .
- Wine Quarter(Supreme Overseer):
- Safe Location: In the barracks in the backyard of the High Overseer's Office.
- Hint location: the guard Berthold will tell you if you save him and his sister Elsa from the caretakers in the backyard, or you can find out from the note that lies in the kitchen behind the barracks.
- Safe contents: purse with 50 coins, Sokolov's healing elixir, sleeping darts.
- Safe code: 203 .
- Wine Quarter(House of Delights):
- Safe location: on the third floor in the art dealer's house.
- Hint Location: Art Dealer in the silver room on the second floor in the Golden Cat. A few electric shocks will force you to share the code.
- Contents of the safe: a painting by Sokolov, an invitation to a reception with the Boyle family, healing herbs, Pierrot's spiritual balm, the Carmine family urn.
- Safe code: 879 , 696 , 679 , 656 , 606 , 138 (the code is constantly changing).
- Kaldwin Bridge(Royal Physician):
- Safe Location: On the third floor of Pratchett's house on Broadbridge.
- Hint Location: In Pratchett's note on the table, to the left of the safe. The numbers are applied to the paintings from the first to the third floor.
- Safe contents: two gold bars worth 100 coins each.
- Safe code: 473 .
- Kaldwin Bridge(Royal Physician):
- Safe location: behind a painting on the third floor of a dilapidated house in the Northern part of the bridge, where prisoners are kept behind a light wall, on the way to the main entrance to Sokolov's house.
- Hint location: the woman will give the code after neutralizing the guards and freeing her from captivity near the collapsed wall of the house, above which the safe is located.
- Safe contents: two gold bars worth 100 coins each.
- Safe code: 294 .
- Dunwall Tower(Return to the tower):
- Safe Location: In a chest in the Lord Regent's chambers.
- Hint location: The propaganda officer from the broadcast station will tell you.
- Contents of the safe: an incriminating audiogram with the Lord Regent's confession, a note from Daoud, a case for the emperors' jewels.
- Safe code: 935 .
- Flooded Quarter(Flooded Quarter):
- Safe Location: In the basement of a flooded house in the courtyard on the way to Daud's lair in Central Rudshore, next to where a crowd of assassins are keeping watch. There is a vent in the room above the safe.
- Hint location:-
- Contents of the safe: figurine of a whale of the emperors.
- Safe code: 428 .
- Flooded Quarter(Flooded Quarter):
- Safe location: in the room next to the first group of river crunches in the old catacombs of Dunwall on the way to Staraya Vetosha.
- Hint location: in the note "Jelly's New Task" and the book "Thirteen Months" next to the safe.
- Safe contents: bone amulet, gold bar worth 100 coins.
- Safe code: 528 .
The manual is designed to show where the safes are located and how to find the code for them. For the most impatient, there are codes for all safes in Dishonored 2 in a list.
Safes are hidden throughout Karnak, from mission to mission you will stumble upon them. Safes store treasures: money, artifacts, weapons, runes. Sometimes, it’s enough just to find a note with a code or enter into a dialogue with a character from the Dishonored 2 universe. Other times, you’ll have to solve riddles and puzzles. Or just search for a long time for the code combination on the map.
To avoid spoilers, the list of safe codes is at the very bottom.
For those who want to find all the codes on their own, you will have to work hard. There are a total of 9 safes in Dishonored 2, let's look at each safe individually.
Mission One: Long Day in Dunwall
The safe is located near the Dunwall tower itself. After you leave the tower, you will see a landmark below - these are three guardsmen who are listening to the senior officer. After you deal with them or pass unnoticed in the shadows, go left until you come across a house with a “For Rent” sign. Enter it, there will be a safe hidden in one of the rented rooms.

Code: You can find it in the same room on the back of the picture to the right of the cache.
What's inside: Silver bars 2 pcs. Pistol and cartridges.
Mission two: At the end of the world

Code: Located in the cash register at the seller's counter. If you go left from the safe, you'll just come across it.
What's inside: Bone amulet, Silver ingot 2pcs., Gold ingot, Gun and cartridges.
- First you need to go to the Overseer Outpost. Behind the electric gates opposite the building with the Seized sign. The safe itself is located in the vice-warden's room on the 3rd floor. There are a lot of caretakers in the house! You can act secretly and get into the room through the balcony. Or you can just kill everyone and rush into this damn room...

Code: The secret lies in the note “Prohibitions that will keep you”, which is located on the same floor in another room, the room is very dark. Nearby you will also find the book “Seven Prohibitions”. Each ban has its own number. To get the required code you need to combine prohibitions. I would like to draw your attention to the fact that almost all codes for safes in Dishonored 2 are generated randomly, this one is no exception.
What's inside: Raw whale bone, Rune, Silver ingot 3pcs.
Mission three: Good Doctor
- When you're at the Addermere Institute on your way to Vasco, you can find a cache. Your goal is on the second floor of the building, after exiting the elevator, go left straight into the laboratory. There, in Vasco’s office, the desired safe will be.
Code: The dying man on a stretcher will tell you the code. You can find him in the room next to the Laboratory, where you will meet Hypatia manipulating pieces of meat on the table.

What's inside: Addermire potion, key to Vasco's laboratory, Note.
- While in the lobby of the Addermere Institute building, you need to look for the “consultation” sign. Having passed in the direction of the sign, you need to move to the balcony, go forward and the safe will be in front of you. Don't forget to grab a note along the way!

Code: The second code for the safe is very easy to find; it is indicated in the note located on the table to the right on the way to the cache itself.
What's inside: Copper wire, Drawings of sleeping darts, Silver ingot 3pcs.
Mission Four: Mechanical Mansion
At the very beginning of the mission, after you climb the stairs from the sewer, look to the left. But here you need to be extremely careful; there are many caretakers on the street. There you will see a building with a large “STATION” sign on it. Go to this building, then follow the alley on the left. There you will see two townspeople, turn left to the “For Rent” sign and go into this building. The cache is located on the second floor in a room with glass walls.
Code: Opposite the room there is a bottle, behind it there are 2 digits of the code, the third digit must be guessed.
What's inside: Sphalerite, Silver ingot 2 pcs., Book “Meeting of Regents”.
Mission five: Royal Cabinet of Curiosities
On the way to the Kunstkamera there is an abandoned building. The most noticeable landmark is a house with a red roof. After climbing onto the house with the red roof, you need to find the entrance. You can enter through the balcony; the balcony is boarded up on top. There will be a large safe in the room on the left.
Code: The password must be purchased from the merchant. “Safe combination” note.
What's inside: Purse, 5 silver bars, pistol and cartridges.
Mission seven: Crack in the universe
The closest landmark is a circular room with a small tree in the center of the room. When entering this room, turn left. To go through the metal one, you need to move into the past, returning to the present, turn into the room to the right. Climb under the table and travel back in time again. There will be a cache in this room if you destroy the bloodfly breeding ground in the past.

Code: In the present, there will be a dead dog lying near the safe. It needs to be burned in a furnace. Having moved into the past, you can see the door from the safe on the floor with the required combination. Although the codes for the safes in Dishonored 2 are mostly random, this code is always the same.
What's inside: Amulet, Silver Ingot, Coins, Kono Star Tables.
Mission Eight: Grand Palace
- A huge tree will serve as a landmark. There will be an open door near the tree, next to the wooden wall; on the third floor you will find a closed iron door with a note. You can enter the apartment through the hole below, to the left of the door. There will be a cache waiting for you in the large room.

Code: In a small room, there is a picture hanging above the table, it depicts a man with this very safe, and the required combination is indicated on it.
What's inside: Silver bar, Gold bar, Gun and ammo.
- In the palace you need to take the elevator to the first floor. To the right of the elevator, go into the first door, then go right into the large doors. There is a second safe in the far right corner behind the table.
Code: The note with the code is on the third floor. If you exit the elevator, this is the first door on the right. There you need to turn right and go up the stairs on the farthest table you will find a note with a code.
What's inside: 2 silver bars, Rune, Gold bar.
Mission Nine: Death to the Empress
In fact, this is the very first safe. But it can be opened again. If you have already opened the safe, the door will simply be locked with a key; opening it with a cannon will not be difficult. If the safe has already been robbed, then traps await you.
Code: The combination remains the same and can be found behind the same picture.
What's inside: If the cache has not been opened before, then you will find 3 coins there. And if the safe was robbed, then a message from the owner awaits you.
First safe: 451
Second safe: random, see description above.
Third safe: random, see description above.
Fourth safe: random, see description above.
Fifth safe: random, see description above.
Sixth safe: random, see description above.
Seventh safe: 238
Eighth safe: 123
Ninth safe: random, see description above.


