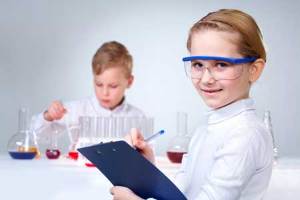
Children are always trying to learn something new every day and they always have a lot of questions. They can explain certain phenomena, or they can clearly show how this or that thing, this or that phenomenon works. In these experiments, children will not only learn something new, but also learn how to create various crafts, with which they can then play.
1. Experiments for children: lemon volcano
You will need:
– 2 lemons (for 1 volcano)
- baking soda
– food coloring or watercolor paints
- dishwashing liquid
– wooden stick or spoon (if desired)
- tray.

1. Cut off the bottom of the lemon so it can be placed on a flat surface.
2. On the back side, cut out a piece of lemon as shown in the image.
* You can cut off half a lemon and make an open volcano.

3. Take the second lemon, cut it in half and squeeze the juice into a cup. This will be the reserved lemon juice.
4. Place the first lemon (with the cut out part) on the tray and use a spoon to “remember” the lemon inside to squeeze out some of the juice. It is important that the juice is inside the lemon.
5. Add food coloring or watercolor inside the lemon, but do not stir.

6. Pour dish soap inside the lemon.
7. Add a spoonful to the lemon baking soda. The reaction will begin. You can use a stick or spoon to stir everything inside the lemon - the volcano will begin to foam.

8. To make the reaction last longer, you can gradually add more soda, dyes, soap and reserve lemon juice.
2. Home experiments for children: electric eels made from chewing worms

You will need:
– 2 glasses
– small capacity
– 4-6 gummy worms
– 3 tablespoons baking soda
– 1/2 spoon of vinegar
– 1 cup of water
– scissors, kitchen or stationery knife.
1. Using scissors or a knife, cut lengthwise (precisely lengthwise - it won't be easy, but be patient) each worm into 4 (or more) pieces.
* The smaller the piece, the better.
*If the scissors do not cut properly, try washing them with soap and water.

2. Mix water and baking soda in a glass.
3. Add pieces of worms to the solution of water and soda and stir.
4. Leave the worms in the solution for 10-15 minutes.
5. Using a fork, transfer the worm pieces to a small plate.
6. Pour half a spoon of vinegar into an empty glass and start putting worms into it one by one.

* The experiment can be repeated if you wash the worms with plain water. After a few attempts, your worms will begin to dissolve, and then you will have to cut a new batch.
3. Experiments and experiments: a rainbow on paper or how light is reflected on a flat surface

You will need:
– bowl of water
– clear nail polish
- small pieces of black paper.
1. Add 1-2 drops of clear nail polish to a bowl of water. Watch how the varnish spreads through the water.
2. Quickly (after 10 seconds) dip a piece of black paper into the bowl. Take it out and let it dry on a paper towel.

3. After the paper has dried (this happens quickly) start turning the paper and look at the rainbow that appears on it.
* To better see a rainbow on paper, look at it under the sun's rays.


4. Experiments at home: rain cloud in a jar

As small drops of water accumulate in a cloud, they become heavier and heavier. Eventually they will reach such a weight that they can no longer remain in the air and will begin to fall to the ground - this is how rain appears.
This phenomenon can be shown to children using simple materials.
You will need:
- shaving foam
- food coloring.
1. Fill the jar with water.
2. Apply shaving foam on top - it will be a cloud.
3. Have your child start dripping food coloring onto the “cloud” until it starts to “rain”—drops of coloring begin to fall to the bottom of the jar.
Explain during the experiment this phenomenon to kid.

You will need:
– warm water
– 4 food colors
1. Fill the jar 3/4 full with warm water.

2. Take a bowl and stir in 3-4 tablespoons of oil and a few drops of food coloring. In this example, 1 drop of each of the 4 dyes was used - red, yellow, blue and green.

3. Using a fork, stir the coloring and oil.

4. Carefully pour the mixture into a jar of warm water.

5. Watch what happens - the food coloring will begin to slowly fall through the oil into the water, after which each drop will begin to disperse and mix with the other drops.
* Food coloring dissolves in water, but not in oil, because... The density of oil is less than water (that’s why it “floats” on water). The dye droplet is heavier than the oil, so it will begin to sink until it reaches the water, where it will begin to disperse and look like a small fireworks display.
6. Interesting experiments: in a circle in which the colors merge
You will need:
– a wheel cut out of paper, painted in rainbow colors
– elastic band or thick thread
– cardboard
- glue stick
- scissors
– skewer or screwdriver (to make holes in the paper wheel).

1. Select and print the two templates you want to use.

2. Take a piece of cardboard and use a glue stick to glue one template to the cardboard.
3. Cut out the glued circle from cardboard.
4. TO back side Glue the second template onto the cardboard circle.
5. Use a skewer or screwdriver to make two holes in the circle.

6. Thread the thread through the holes and tie the ends into a knot.
Now you can spin your top and watch how the colors merge on the circles.


7. Experiments for children at home: jellyfish in a jar

You will need:
– small transparent plastic bag
– transparent plastic bottle
- food coloring
- scissors.

1. Place the plastic bag on a flat surface and smooth it out.
2. Cut off the bottom and handles of the bag.
3. Cut the bag lengthwise on the right and left so that you have two sheets of polyethylene. You will need one sheet.
4. Find the center of the plastic sheet and fold it like a ball to make a jellyfish head. Tie a thread in the area of the “neck” of the jellyfish, but not too tightly - you need to leave small hole to pour water into the jellyfish’s head through it.
5. There is a head, now let's move on to the tentacles. Make cuts in the sheet - from the bottom to the head. You need approximately 8-10 tentacles.
6. Cut each tentacle into 3-4 smaller pieces.

7. Pour some water into the jellyfish's head, leaving room for air so the jellyfish can "float" in the bottle.
8. Fill a bottle with water and put your jellyfish in it.

9. Drop a couple of drops of blue or green food coloring.
* Close the lid tightly to prevent water from spilling out.
* Let the children turn the bottle over and watch the jellyfish swim in it.
8. Chemical experiments: magic crystals in a glass

You will need:
– glass tumbler or bowl
– plastic bowl
– 1 cup Epsom salts (magnesium sulfate) – used in bath salts
– 1 cup hot water
- food coloring.
1. Place Epsom salts in a bowl and add hot water. You can add a couple of drops of food coloring to the bowl.
2. Stir the contents of the bowl for 1-2 minutes. Most of the salt granules should dissolve.

3. Pour the solution into a glass or glass and place it in the freezer for 10-15 minutes. Don't worry, the solution is not so hot that the glass will crack.
2There are ways to have fun and usefully spend your free time with the whole family, so that neither parents nor children get bored. One of these ways is home experiments, experiments using those objects available in every home that surround us every day.
For young, inquisitive family members, such experiments will allow them to join the world of science and create true miracles with their own hands. Parents will be able to recall school knowledge and unobtrusively convey some of it to their children.
The laws of both physics and chemistry apply, regardless of whether it is a laboratory or own kitchen. It may happen that these experiences will prompt your child to seriously seek an explanation for what he saw, and perhaps become the beginning of a long journey into science for him. Experiments for children at home will be very exciting and will help your baby learn a lot of new and interesting things.
With us you will easily and safely experiment with such familiar things: water, fire, magnet and mirror.
Experiments with liquids will help you become a real wizard
Homemade rainbow using water and mirror
Want to see a rainbow at home? All you need is a basin half filled with water and a mirror. small size, a flashlight and a sheet of paper (white).
- You need to place the mirror in a basin of water. The mirror should fit entirely in it.
- Turn on the flashlight and shine it directly on the mirror.
- All you have to do is catch the reflection on a piece of paper and admire the real rainbow.
Many of us in childhood They repeated more than once: “Every hunter wants to know where the pheasant sits.” Today's children know that the first letters of words mean the colors of the rainbow.
And if they don’t know, you have a reason to help your child learn the colors of the rainbow in this way. In addition, after such an experiment, it is much easier to talk about light as a source of color, and about more serious things, for example, about the color spectrum.
Colored milk with bright pictures and patterns
Do you believe that in milk that suddenly comes to life, colorful pictures can appear as if by themselves, as if someone was painting them? You can create it yourself.
For the experience you need to take:
- milk (half a glass);
- flat plate;
- 3-4 food colorings;
- just a little liquid soap;
- a couple of cotton swabs.
- The milk needs to be poured into a container.
- Then take the dyes and add them to the milk one by one, different colors one after another.
- You will see that their movement creates patterns on the surface.
- Cotton swabs, which you first dip into the soap and then into the plate, will only speed up this movement and cause the dyes to mix.
- By moving the sticks around the plate, you will draw extraordinary, fantastic, colorful pictures. All that remains is to admire them.
Be sure to explain to your baby that the movement occurs because fat molecules are broken down from the soap.
Movement of a boat without wind or motor
And now you can see that the boat can move without wind or a motor. Don't believe me? Let's prepare:
- a bath (or smaller vessel) with water;
- a little liquid soap;
- plastic corner or film;
- scissors.
- All children love and know how to cut. Instruct your child to cut out a boat in the shape of a triangle, with a slit and a hole in the middle.
- Lower the boat into the water, and round hole gently drip the soap. Your boat literally took off!
- You're still dripping. She's swimming again.
Are you sure? And the child will be delighted.
Floating iceberg using ice and oil
An excellent reason to talk about the fact that different substances have different densities, some things sink to the bottom, and some don’t.
For the experience you need:
- one glass of water;
- ice Cube;
- 50 ml vegetable oil.
If you throw ice into a glass of water, it will remain on the surface.
Add butter and the cube will be at the bottom. The oil will prevent it from rising to the surface.
Carry out a similar experiment with lemon. Let your child see that the lemon will float like an ice cube in the peel. But once you clear it, it will sink.
Optical experiments at home for young children
Experiment using black sheet and figures
 The study should be carried out in sunny, clear weather. Prepare:
- one sheet thick paper black color;
- several flat objects (cutters, rulers, etc.) or simply cut out figures from another sheet.
- Place items on a piece of paper, leaving free space between them.
- Let the leaf remain in the sun.
- Towards evening, you can carefully examine the results of the experiment and make sure that the paper under the figures is still bright black, and open space the sheet burned out and became lighter.
The magic mirror will show distorted figures
Usually we see our reflection in the mirror. It turns out that distorted things and objects can be reflected in it. Don't believe me? You will need:
- small mirror;
- cup;
- scotch.
- First you need to tape a glass to the mirror and pour water into it.
- As your face approaches the glass, the reflection will decrease. And when you lean, for example, to the right, the tilt in the opposite direction is reflected.
It's time to explain to your baby that this effect is achieved due to the refraction of light, and a distorted image appears in the mirror.
See the invisible on a hidden sheet
Can we see what no one else sees? We can try. Prepare for the experiment:
- 2 sheets;
- envelope;
- pen or felt-tip pen.
- We write any word on a piece of paper. You can draw something small.
- After this, we hide the sheet in an envelope.
The size of the sheet should be smaller than the envelope so that the entire envelope can fit. You can make sure that you won’t be able to see the inscription through the envelope.
- Roll the second sheet into a tube.
- Now try to read the inscription by placing the “spyglass” you made with your own hands tightly to the envelope. If your room is well lit, you will succeed.
Panic room for young children and adults
All little children love scary stories. Some of the adults too. You can create a panic room in your home. To do this you need to take:
- wall mirror;
- a sheet of paper approximately the same size as the mirror;
- scissors.
You can use a table lamp as a light source.
- First, you need to cut out a scary face on a sheet of paper.
- Attach this sheet to the mirror (you can use transparent tape).
- It is necessary to turn on the lamp behind the back of the experiment participant. The shadow of his head will fall on the wall.
- Invite him to close his eyes.
- We place the mirror so that the reflections from the terrible face fall on its shadow.
- You can open your eyes! Scary?
What else you should definitely read:
Complex experiments with fire, electricity and magnets
Do not leave children alone during such experiments.
The fireproof ball will amaze with its strength
 Everyone knows about the enormous destructive power of fire. It burns and melts, destroying everything in its path. Everyone knows this.
Useful tips
Children are always trying to find out something new every day, and they always have a lot of questions.
They can explain some phenomena, or they can show clearly how this or that thing, this or that phenomenon works.
In these experiments, children will not only learn something new, but also learn create differentcrafts, with which they can then play.
1. Experiments for children: lemon volcano

You will need:
2 lemons (for 1 volcano)
Baking soda
Food coloring or watercolor paints
Dishwashing liquid
Wooden stick or spoon (if desired)

1. Cut off the bottom of the lemon so it can be placed on a flat surface.
2. On the back side, cut out a piece of lemon as shown in the image.
* You can cut off half a lemon and make an open volcano.

3. Take the second lemon, cut it in half and squeeze the juice into a cup. This will be the reserved lemon juice.
4. Place the first lemon (with the cut out part) on the tray and use a spoon to “squeeze” the lemon inside to squeeze out some of the juice. It is important that the juice is inside the lemon.
5. Add food coloring or watercolor inside the lemon, but do not stir.

6. Pour dish soap inside the lemon.
7. Add a full spoon of baking soda to the lemon. The reaction will begin. You can use a stick or spoon to stir everything inside the lemon - the volcano will begin to foam.

8. To make the reaction last longer, you can gradually add more soda, dyes, soap and reserve lemon juice.
2. Home experiments for children: electric eels made from chewing worms

You will need:
2 glasses
Small capacity
4-6 gummy worms
3 tablespoons baking soda
1/2 spoon of vinegar
1 cup water
Scissors, kitchen or stationery knife.
1. Using scissors or a knife, cut lengthwise (precisely lengthwise - it won't be easy, but be patient) each worm into 4 (or more) pieces.
* The smaller the piece, the better.
*If the scissors do not cut properly, try washing them with soap and water.

2. Mix water and baking soda in a glass.
3. Add pieces of worms to the solution of water and soda and stir.
4. Leave the worms in the solution for 10-15 minutes.
5. Using a fork, transfer the worm pieces to a small plate.
6. Pour half a spoon of vinegar into an empty glass and start putting worms into it one by one.

* The experiment can be repeated if you wash the worms with plain water. After a few attempts, your worms will begin to dissolve, and then you will have to cut a new batch.
3. Experiments and experiments: a rainbow on paper or how light is reflected on a flat surface

You will need:
Bowl of water
Clear nail polish
Small pieces of black paper.
1. Add 1-2 drops of clear nail polish to a bowl of water. Watch how the varnish spreads through the water.
2. Quickly (after 10 seconds) dip a piece of black paper into the bowl. Take it out and let it dry on a paper towel.

3. After the paper has dried (this happens quickly) start turning the paper and look at the rainbow that appears on it.
* To better see a rainbow on paper, look at it under the sun's rays.


4. Experiments at home: rain cloud in a jar

As small drops of water accumulate in a cloud, they become heavier and heavier. Eventually they will reach such a weight that they can no longer remain in the air and will begin to fall to the ground - this is how rain appears.
This phenomenon can be shown to children using simple materials.
You will need:
Shaving foam
Food coloring.
1. Fill the jar with water.
2. Apply shaving foam on top - it will be a cloud.
3. Have your child start dripping food coloring onto the “cloud” until it starts to “rain” - drops of coloring begin to fall to the bottom of the jar.
During the experiment, explain this phenomenon to your child.

You will need:
Warm water
Sunflower oil
4 food colors
1. Fill the jar 3/4 full with warm water.

2. Take a bowl and stir in 3-4 tablespoons of oil and a few drops of food coloring. In this example, 1 drop of each of 4 dyes was used - red, yellow, blue and green.

3. Using a fork, stir the coloring and oil.

4. Carefully pour the mixture into a jar of warm water.

5. Watch what happens - the food coloring will begin to slowly fall through the oil into the water, after which each drop will begin to disperse and mix with the other drops.
* Food coloring dissolves in water, but not in oil, because... The density of oil is less than water (that’s why it “floats” on water). The dye droplet is heavier than the oil, so it will begin to sink until it reaches the water, where it will begin to disperse and look like a small fireworks display.
6. Interesting experiments: ina circle in which the colors merge
You will need:
- printout of the wheel (or you can cut out your own wheel and draw all the colors of the rainbow on it)
Elastic band or thick thread
Glue stick
Scissors
Skewer or screwdriver (to make holes in the paper wheel).

1. Select and print the two templates you want to use.

2. Take a piece of cardboard and use a glue stick to glue one template to the cardboard.
3. Cut out the glued circle from cardboard.
4. Glue the second template to the back of the cardboard circle.
5. Use a skewer or screwdriver to make two holes in the circle.

6. Thread the thread through the holes and tie the ends into a knot.
Now you can spin your top and watch how the colors merge on the circles.


7. Experiments for children at home: jellyfish in a jar

You will need:
Small transparent plastic bag
Transparent plastic bottle
Food coloring
Scissors.

1. Place the plastic bag on a flat surface and smooth it out.
2. Cut off the bottom and handles of the bag.
3. Cut the bag lengthwise on the right and left so that you have two sheets of polyethylene. You will need one sheet.
4. Find the center of the plastic sheet and fold it like a ball to make a jellyfish head. Tie a thread in the area of the jellyfish's "neck", but not too tightly - you need to leave a small hole through which to pour water into the jellyfish's head.
5. There is a head, now let's move on to the tentacles. Make cuts in the sheet - from the bottom to the head. You need approximately 8-10 tentacles.
6. Cut each tentacle into 3-4 smaller pieces.

7. Pour some water into the jellyfish's head, leaving room for air so the jellyfish can "float" in the bottle.
8. Fill a bottle with water and put your jellyfish in it.

9. Add a couple drops of blue or green food coloring.
* Close the lid tightly to prevent water from spilling out.
* Let the children turn the bottle over and watch the jellyfish swim in it.
8. Chemical experiments: magic crystals in a glass

You will need:
Glass glass or bowl
Plastic bowl
1 cup Epsom salts (magnesium sulfate) - used in bath salts
1 cup hot water
Food coloring.
1. Place Epsom salts in a bowl and add hot water. You can add a couple of drops of food coloring to the bowl.
2. Stir the contents of the bowl for 1-2 minutes. Most of the salt granules should dissolve.

3. Pour the solution into a glass or glass and place it in the freezer for 10-15 minutes. Don't worry, the solution is not so hot that the glass will crack.
4. After freezing, move the solution to the main chamber of the refrigerator, preferably on top shelf and leave overnight.

The growth of crystals will be noticeable only after a few hours, but it is better to wait overnight.
This is what the crystals look like the next day. Remember that crystals are very fragile. If you touch them, they will most likely immediately break or crumble.

9. Experiments for children (video): soap cube
10. Chemical experiments for children (video): how to make a lava lamp with your own hands
Your baby has already grown up. He is over 4 years old. you dealt with him early development and taught the most basic and important skills: walking, dressing, communicating with peers, distinguishing colors and shapes. Now your child is a completely independent, mature person and can not be distracted for 5-10 minutes while completing the task you propose. If you have a question “how to develop a hyperactive child.”
Our answer: Continue to develop perseverance.
If you have already sent your child to kindergarten, then your he/she will receive the knowledge, skills and abilities necessary for entering school. Just don’t rule out home education and development. Your journey together into the land of simple children's tricks, experiences and experiments is only just beginning to unfold. The time has come to become more deeply acquainted with the unknown world around us. Take a different look at the house and the objects in it, the nature outside the window, at things that are already familiar to you. Continue to communicate with your child and spend time together. Organize interesting experiments, experiments and tricks for children at home.
Let's experiment. Let's take simple, familiar objects and see what else they can do. Don’t rush to get your hands on the multi-volume “Great Soviet Encyclopedia.” It contains a lot of useful and interesting things, but you will need it much later. In this section of the educational website for children, you will find an excellent collection of educational games and entertaining development games. The proposed experiments will interest both boys and girls. And you already have everything you need to organize a “home laboratory”. Look in the kitchen, bathroom and other rooms. Found it?
Then think, what element do you want to study today? What experiments will you conduct in your home laboratory? Choose from the list and get started.
Experiments for children
- Experiments with water/density
- Experiments with sand / sugar / salt / starch
- Experiments with light / mirrors / candle / color
- Experiments with equilibrium / electricity / thermal conductivity
I have an interesting offer for you. I want to give you a gift. Very useful for you, your child and your whole family. They say that best gift- this is a book. And today I want to give you two wonderful collections. This step by step instructions about how to organize your home home laboratory. This book contains amazing experiences with water for you. And you will find the answer to the question of how to tame sound. And if there are a lot of sounds in your house, then it’s time for you to master these entertaining experiments.
By using interesting experiments you will introduce your child to the four main elements: water, air, fire and earth (its gifts). Give your child a ton of positive emotions. Teach your child to observe, analyze, draw conclusions, and express his thoughts. Our task is not to raise young chemist or physics. We want to make your child's childhood interesting, happy, fun, and as educational as possible. Prepare him for further education at school. Make sure that this training is easy for him. Arouse interest in learning, develop curiosity and perseverance. It’s interesting to answer a million different questions that pop up in thousands of “PocheMuk”’s heads every day.
Follow our updates
Share your impressions of your joint experiences in the comments.
Entertaining chemical experiments will prepare children to study chemistry at school. Most of the experiments carried out at home are not dangerous, educational, and effective. Some experiments are provided with a written description, which will help explain to the child the essence of the processes taking place and awaken interest in chemical science.
When conducting chemical experiments at home, you must follow following rules security:
Simple experiments for little ones
Chemical experiments for young children, carried out at home, do not require any special substances.
Colored bubbles
For one such experiment you will need:
- fruit juice;
- sunflower oil;
- 2 effervescent tablets;
- decorative transparent container.
Stages of experience:

You can create bubbles with a stronger shell yourself by mixing water and dishwashing detergent in a 2:1 combination + a little granulated sugar. If you add glycerin instead of sugar, the bubbles will be very high. large sizes. Adding to soap solution food coloring will create colored glowing bubbles.
Night light
You can make a night light at home using simple substances. To do this you will need:
- tomato;
- syringe;
- sulfur heads from matches;
- hydrogen peroxide;
- bleach.
Sequencing:
- Place sulfur in a bowl, add bleach, and leave for a while.
- Draw the mixture into a syringe and prick the tomato from all sides.
- To start chemical reaction hydrogen peroxide must be introduced. This is also done with a syringe in the place where the petiole was located.
- Being in dark room, the tomato will emit soft light.
Carefully! You can no longer eat this tomato.
Sizzling balls
You can make your own sizzling balls for children's bathing.
During work, hands must be protected with gloves.
Sequencing:

Floating worms
For the next experiment you will need:
- 3 jelly worm candies without sugar sprinkles;
- soda;
- acetic acid;
- water;
- glass glasses.
Stages of work:
- The first glass is half filled with acetic acid.
- Pour warm water into the second glass and dilute 60 g of soda.
- Place the candies in the solution and leave for 15 minutes.
- Remove the candies from the soda solution and place them in a glass with the essence.
- The surface of the candy will immediately become covered with bubbles; they will continuously rise to the surface and fall to the bottom of the glass. This happens because soda first fills the pores of the candy, then, reacting with vinegar, it releases carbon dioxide, which lifts the candy up.
- When they come into contact with air, the bubbles burst, the candy sinks to the bottom and again becomes covered with bubbles and rises.
Experiments for older children
Chemical experiments for children at home can be more complex and interesting.
Volcano
So, any schoolchild can simulate a volcanic eruption at home:

Colored foam
To experience creating colored foam you will need:

Sequencing:
- The glasses are placed on a tray, half filled with soda, and dyes are added.
- Mix vinegar with detergent, pour into glasses.
- Colored foam will come out of each glass. You can pour the vinegar mixture into glasses several times until all the soda is released.
Malachite egg
Coloring experiment chicken egg in malachite color long lasting but interesting:
- To do this, remove the contents from the egg: make 2 holes and blow it out.
- For weight, a little plasticine is placed into an empty egg.
- Dissolve a spoon in 0.5 liters of water copper sulfate(This can be purchased at a hardware store).
- Dip the egg into the solution; the shell should be completely immersed in the solution.
- After a few days, gas bubbles will appear.
- After a week, the shell will acquire a light blue-green color.
- After a month, the color of the shell will become rich malachite.
Fireworks
Making fireworks with your own hands:

- Magnesium shavings are very finely ground.
- Sulfur match heads are separated from the wood. You will need 2-3 boxes of matches. Crushed magnesium is mixed with sulfur powder.
- Take a metal tube and seal one of the holes tightly with plaster.
- Pour a mixture of magnesium and sulfur into the tube. The mixture should not occupy more than half of the tube.
- The tube is wrapped several times with foil. A wick is inserted into the free hole.
- Such fireworks can only be exploded in deserted places.
Coloring water blue
For coloring colorless liquids Blue colour needed:
- alcohol solution of iodine;
- hydrogen peroxide;
- vitamin C tablet;
- starch;
- glass glasses.
Performing the experiment step by step:
- A vitamin C tablet is ground into powder and dissolved in 55 ml of warm water.
- Pour 5 ml of the resulting solution into a glass, add 5 ml of iodine and 55 ml of heated water. The iodine should become discolored.
- Separately mix 18 ml of hydrogen peroxide, 5 g of starch, 55 ml of water.
- The iodine solution is poured back and forth into the starch solution several times.
- The colorless liquid will turn dark blue. Iodine loses color when it reacts with vitamin C. Starch turns blue when mixed with iodine.
Simple experiments on the properties of metals
Chemical experiments for children at home can be carried out with metals.
For simple experiments will need:
- fire;
- pieces of various metals;
- foil;
- copper sulfate;
- ammonia;
- acid.
To experiment with copper wire, a small piece of metal is twisted into a spiral and heated strongly over a fire. Then immediately lower it into a container with ammonia. The reaction will occur instantly: the metal will begin to hiss, and the black coating formed when exposed to fire will disappear. Copper wire will shine again. It is better to do the experiment several times, then the color of the ammonia will turn blue.


For the next experiment you will need solid iodine, crushed aluminum, warm water. Iodine is mixed with aluminum in equal shares. Water is added to the mixture. The powder begins to burn, releasing purple smoke.
Another experiment will involve:
- chrome-plated paper clip;
- galvanized steel nail;
- pure steel screw;
- acetic acid;
- 3 test tubes.
Stages of experience:
- Metal objects are placed in test tubes, filled with acid, and left for observation. In the first days, hydrogen evolution is observed.
- On the 4th day, the acid in test tubes with metal objects with the coating it begins to turn red. In a test tube with a steel screw, the acid becomes Orange color, a precipitate appears.
- After 2 weeks in a test tube with a paper clip, the acid turns red, but only in upper layers. Where the paperclip is located, the acid is colorless. After removing the paperclip, you can see that it appearance not changed.
- Acid in a test tube with a nail is colored with smooth transition red to pale yellow. The nail hasn't changed.
- In the 3rd test tube, layered coloration of the liquid and sediment are also observed. The screw turned black, the upper microlayers of the metal collapsed.
Conclusion: unprotected iron is susceptible to corrosion.
For the next experiment, you need to prepare a blue solution of copper sulfate (dissolve several crystals in water, stir). Place non-rusty nails in a test tube and fill with solution. After some time, the solution will turn green and the nails will turn copper-colored. This happened because iron displaced copper from the liquid, and the displaced copper settled on metal objects.
To conduct the “Hydrogen Glove” experiment you will need:

Sequencing:
- The saline solution and copper sulfate solution are simultaneously poured into the flask. When mixed, a sea-green liquid is obtained.
- Make a lump of foil and place it in the hole of the flask. Immediately, hydrogen begins to rapidly evolve.
- Put it on the neck rubber glove, it instantly fills with gas.
- When the glove comes into contact with fire, it ruptures and the gas ignites. The liquid in the vessel gradually acquires a dirty gray tint.
The most spectacular chemical experiments for children
Chemical experiments for children at home are very diverse, and some are very impressive.
Colored foam
To make a large number of colored foam you need:

Bleached green
For the experiment on bleaching greenery you will need:
- brilliant green solution;
- glasses;
- bleach;
- ammonia;
- vinegar;
- hydrogen peroxide;
- pills activated carbon.
Sequencing:
- Water is poured into 6 glasses, a drop of greenery is added to each.
- The 1st glass is set aside for comparison, bleach is added to 2, ammonia to 3, peroxide to 4.
- Ammonia instantly discolors the liquid.
- Small bubbles appeared in the glass with bleach, and the solution became colorless.
- Hydrogen peroxide will discolor the liquid gradually, over about 15 minutes.
- Adding vinegar to the solution will make the liquid brighter.
- After 30 min. the liquid becomes lighter.
- Activated carbon brightens the solution.
Pharaoh snake
Conducting an experiment called “Pharaoh’s Snake” will require:

Stages of experience:
- The sand is soaked in alcohol and formed into a cone.
- A recess is made at the top.
- Mix soda with sugar and pour into the well.
- The soaked sand is set on fire.
- The mixture will turn into black balls, soda and sugar will begin to decompose.
- After burning the alcohol, a snake will appear, consisting of the products of burning sugar.
Pharaoh's snake made from sugar and soda:
Fire without a spark
To create a fire without a spark, you need potassium permanganate, glycerin and paper.
Sequencing:
- Place approximately 1.5 g of potassium permanganate powder in the center of a sheet of paper, cover with the free edge of the sheet.
- Apply 3 drops of glycerin to the paper in the place where the powder is located.
- After 30 seconds, potassium permanganate will begin to hiss, smoke and produce black foam. The exothermic reaction will heat the paper and it will catch fire.
Fireworks
To make small fireworks at home, you need to choose a small fireproof dish with a long handle.


Sequencing:
- On a paper sheet you need to pour a crushed tablet of activated carbon, the same amount of potassium permanganate and the same amount of iron filings.
- Fold a piece of paper in half to combine the powders (powders should not be mixed with spoons or spatulas; they may ignite).
- Carefully pour into a fireproof container and heat over the burner. After a few seconds. the heated mixture will begin to emit sparks.
Chemistry sets for children
Chemical experiments for children at home will help you carry out special sets of substances and tools.
Experiment kit “Vulcan”
Designed for children over 14 years old, it allows you to independently reproduce the eruption of a small volcano.
Equipment:

To conduct the experiment, you first need to make the volcano itself; sand or gypsum is suitable as a material. When the mountain has frozen, a special powder is poured into the depression and set on fire. The substance begins to burn spectacularly, throwing out sparks, and ash appears.
The advantages of such an experiment include a visual representation of flammable substances. Disadvantages: availability harmful substances, can only be used once.
Price: 440 rub.
Chemistry set
The kit provides for growing crystals at home.

The set includes:
- ammonium crystal;
- dye;
- polypropylene container;
- gloves;
- colored glass base;
- stirring tool;
- instructions.
Stages of work:
- Pour crystalline powder into a container and mix with 150 ml of boiling water.
- Stir until completely dissolved.
- The base of the crystal is immersed in the liquid.
- Cover with a lid for 60 minutes.
- Add a substance to form a crystal into the cooled water and close the lid.
- After a day, remove the lid.
- Wait until the top of the crystal appears above the water.
- The water is drained, the crystal is removed and dried.

The experiment is very interesting for children and is practically safe, but it will take at least 4 days to complete.
Cost of the set: 350 rub.
Set for chemical experiments “Traffic light”
Set includes:
- sodium hydroxide;
- glucose;
- indigo carmine;
- 2 measuring cups;
- gloves.
Sequence of experience:
- Glucose (4 tablets) is dissolved in 1 glass using a small amount of boiling water Add 10 mg sodium hydroxide solution.
- A little indigo carmine is dissolved in the 2nd glass.
- A solution of glucose and alkali is poured into the resulting blue liquid.
- When mixing the solutions, the liquid will turn green (oxygen in the air oxidizes indigo carmine).
- Gradually the solution will turn red, then yellow. If the vessel with the yellow solution is shaken, the liquid will turn green again, then red and yellow.

The experiment is spectacular, interesting and safe. The disadvantages include insufficiently detailed instructions.
Set price: 350 rub.
Advantages and disadvantages of home experiments
| Experience name | Advantages | Flaws |
| Pharaoh snake | Availability of materials, entertainment | Not safe |
| Growing Crystals | Complete security, visibility | The experiment is quite long |
| Volcano | Clearly demonstrates the interaction of substances | Long preparations for the experiment |
| Experiment on the interaction of metals with various liquids | Effectiveness, safety | Requires a lot of time to carry out |
| Home fireworks | Entertainment and availability of substances used | Not safe |
Most chemical home experiments, when carried out correctly, do not harm the child’s health, but it is better to carry them out under adult supervision. All the necessary substances can be found in any kitchen.
Experiments will reveal to children the secrets of the interaction of substances and arouse interest in understanding the world.
Article format: Svetlana Ovsyanikova
Video on the topic: chemical experiments for children
Home miracle laboratory: chemical experiments for children:


