The technique of modeling from "chewed (or torn) paper" (in French, papier-mâché) appeared in France at the beginning of the 16th century. There are two ways to prepare paper stock. We will explore both by making our own papier-mâché masks.


Modeling from paper pulp
The video shows the preparation of raw materials from the lowest quality gray toilet paper. She is torn to pieces, poured hot water and leave for 2-3 hours. You can also use newspapers to prepare the mass, and even cardboard egg cells.
Knead the mass, squeeze out excess water, grind and lay out to dry a little.
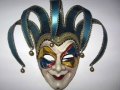
We add PVA glue, putty, soap and knead the paper mass, which can be used to create any masterpieces with your own hands, even such an original mask.
From the video it is not clear what material the form for papier-mâché is made of. How and from what to make it, you can find out below.
This is pasting any form with small pieces of paper in several layers. If we make a carnival mask with our own hands from papier-mâché for a specific person (for ourselves, for example), the face itself can become the shape.
To make a mask in this technique, we need:
- newspapers;
- napkins;
- culinary film;
- gauze or thin cloth;
- PVA glue;
- putty;
- scissors;
- paint, brush, braid, elastic.
Work order
- Lubricate the skin of the face with oily cream or petroleum jelly. Put a thin layer on it polyethylene film. Secure the edge with a headband or headband. Be sure to make holes for breathing in the nostrils.

- Put the first 3 layers on a film of napkins soaked in water. Then you need to make another 10 layers of small pieces of newspaper smeared with glue. This should be done gradually: 2 layers of newspaper, then dry with a hairdryer and again 2 layers. And napkins and newspaper you can not cut it, you can only tear it with your own hands.

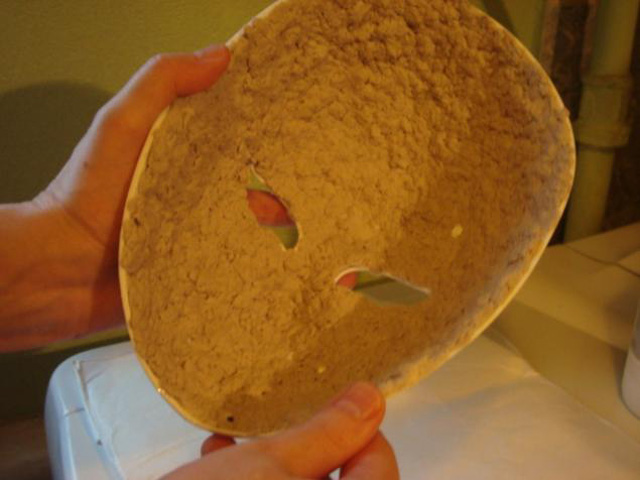
- After the papier-mâché has dried, remove the blank from the face, remove the film and trim the edges. To make slits for the eyes where they should be, apply it again on the face, outline the contours with a pencil. Carefully cut along the drawn lines.

- Tape the mask on both sides with gauze. In this case, it is necessary to wrap the ends with a cloth to smooth out the roughness. Let the product dry. Putty and polish.

- Now it remains to do the decoration with your own hands. Paint the mask and glue on various pretty things. Sew on ribbon or elastic.


Using a live face as a form is not always convenient. There are many other items and materials that you can use to make papier-mâché masks.
For example, papier-mâché carnival masks can be made by hand using a mannequin head as a shape. If you stick plasticine in the shape of a fox nose on the nose of the mannequin, and on the forehead in the shape of ears, you can make a chic fox mask using any of the proposed techniques.

Indian ritual masks work great if on a regular wooden block stick plasticine and form it in the form of some scary face. Before starting work, it is necessary to place the plasticine mold in the freezer for several hours so that the material hardens.
The shape of the future papier-mâché product can be formed from ordinary foil. If it is strongly wrinkled, then any figure can be made from a soft lump. We make the shape smooth using the same plasticine or simply wrapping it with a film.

Any existing mask can be easily duplicated using these simple technologies. In order for the papier-mâché mask to be removed well, it is necessary to lubricate the surface of the mold with oil or any fat, and then apply layers of scraps of napkins or newspapers moistened with water.
In order to make such a mask, you need a plastic mold.
- We first lubricate it with cream, oil or petroleum jelly, then lay out the paper mass with a thickness of about 5 mm. We will not do anything for at least a day until the paper raw material dries. It is impossible to dry it forcibly on the battery.
- Take out the workpiece, cut the eyes and align the edges. Apply a coat of putty, let dry, sand down and apply war paint.

Carnival is a holiday that is fraught with a mystery. Since the favorite holiday of children is coming soon -New Year, every child would like to have a costume for a photo under the tree and a meeting with Santa Claus, and what a costume without a mask. In this difficult preparation, the papier-mâché technique will help you, namely, a do-it-yourself papier-mâché mask master class for carnival.

Easy option
Of course, the most in a simple way making a mask is to use a ready-made base if you have a mask left in stock that is no longer interesting to wear a second time. And then a master class will tell you how to make such a miracle.


Pieces of torn paper, pre-soaked in a small amount of water, remain the standard set for making any papier-mâché.
So, let's begin. Before making a new carnival mask, the old one should be wiped with wet hands so that the paper lays evenly. In the next step, we lay pieces of paper and leave our base to dry.
Then repeat the procedure for applying papier-mâché in thin layers 5 times, leaving our future miracle to dry periodically. Having processed all the irregularities with a small sandpaper, we do not forget about caution. You should not press hard on the product, otherwise it may crack, of course, and we will fix this, but it is better to be careful. The last step there will be cooking bright colors and elastic bands to attach our mask.
The mask is ready detailed video instruction can be viewed here:
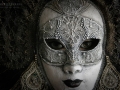
Venetian night
The process of making a Venetian mask may not seem very simple, but we will consider it in detail.

Standard ingredients for making a Venetian mask:
- scraps of paper;
- glue;
- bandages or gauze;
- scissors and good mood.
This mask can be done directly on the face, after lubricating it with plenty of oily cream or petroleum jelly. Or for this we take a ready-made mask made of plasticine or clay.


A thin layer of papier-mâché should be applied to the face of our model and allowed to harden a little, then carefully removed and left to dry in a warm place.

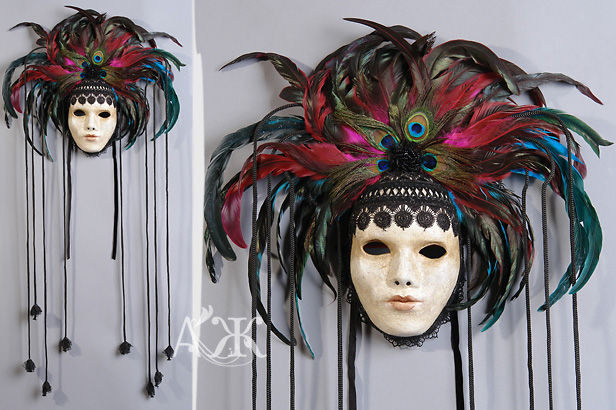
After drying, the mask is not yet ready, it should be smeared with glue and a small amount of papier-mâché should be applied to the outer and inner parts. To make the mask durable, we use a piece of fabric as the last layer. To decorate Venetian masks, they usually use feathers, rhinestones, everything that your soul wants.
Mask decoration options can be viewed here:


Video on the topic of the article
Video instructions for making a Venetian mask with your own hands:
The best material for making carnival masks is papier-mâché, a paper mass made in a special way that easily soaks in water, but does not turn into porridge, so it is best to use ordinary newsprint. So on the eve of the New Year, we will learn from how to make a papier-mâché mask in order to create a bright and non-standard carnival outfit for yourself (or your child) for the holiday.
So, for work we need:
- old newspapers;
- thick paper(soft cardboard soaked in water, writing paper, old magazine sheets or craft paper);
- a skein of bandage or a piece of old cotton fabric;
- sharp stationery scissors;
- wide brushes and paste (you can use PVA glue);
- clay, special plasticine (materials that harden easily in air);
- finishing materials (thin fabric, lace, velvet, feathers, rhinestones, sequins, laces):
- varnish, acrylic paints etc.
Let's start preparing!
Before starting work, you need to slightly dilute the PVA glue with water, and if you did not have time to buy it, then prepare a regular paste. To do this, you need to stir 2-4 tbsp. (without a slide) starch in a liter of water and, stirring constantly, cook this mixture over low heat until thickened. A small cup of paste will be enough for one mask.
Making a blank for the mask
The second stage is the manufacture of a model, on the basis of which we will make a mask. To do this, you need to decide in which image you want to charm guests at the holiday and take as a basis a ready-made plastic or cardboard mask that will suit you in size and shape. Then we make exactly the same mask from clay or sculptural plasticine.
If you have some skills in working with plaster or clay, and you are good at drawing or versed in anatomy, you can try to make a cast of your own face yourself. The main rule is to accurately observe all proportions so that the papier-mâché mask fits well on it. It is very important to use quality natural materials not to call allergic reaction on the skin.

Creating the mask itself
When the form is ready, let it dry completely, and then cover with a layer of Vaseline and start pasting it with papier-mâché paper.
To start, tear two types of paper (for example, color and newsprint, newspaper and writing, cardboard and magazine) onto small pieces. You need to tear in layers - the first of thick paper, so that the mask acquires the necessary hardness. This layer does not need to be glued, but simply laid on a form smeared with petroleum jelly. The second layer (newsprint) is already placed on the adhesive base, while each glued piece should be well smoothed so that air bubbles do not appear under it, otherwise the mask will look loose.
The third layer is thick paper, for gluing which you need to use a thicker paste and work very carefully so that each piece can stick well to the previous layer. The fourth layer is newsprint (plain colored or writing) paper.
The next step is pasting the mask with a bandage or cloth. To do this, cut the rag material into small pieces and soak them thoroughly in adhesive solution. This work must be done very carefully and carefully, because wrinkles may occur. Use some hard object to level the fabric, and cut off the pieces that stand out “from the big picture” with scissors. And once again stick a couple of paper layers - from newspapers and cardboard. In order to highlight the relief areas, glue on them large quantity paper. And finally the most last layer, for which you need to take pre-soaked dense white paper or a clean white cotton cloth.
Latest improvements
To smooth out all the bumps, wipe the joints of the paper with a damp cloth (when the glue has glued all the paper layers well). A little advice artists how to make a papier-mache mask more reliable - coat it with a gelatin solution.
Then dry the finished mask for 3-4 days in normal conditions, during this period, do not remove it from the mold so that it does not accidentally deform.
Now we proceed to the most interesting stage - the finished mask. You can paint it with paints (in a can, acrylic, a mixture of gouache and PVA glue, oil, diluted on a desiccant) or cover it with a fabric base (velvet, satin, lace). To fix a layer of paint, sprinkle it well with regular hairspray.
If you decide to cover the mask with fabric, then first carefully cut the fabric to the shape of your mask, not forgetting the allowances, make cuts for the mouth and eyes. Then cover the fabric with super glue and carefully lay it out on the mask so that there are no wrinkles. When the fabric is glued, the allowances are wrapped on reverse side and are also glued. From the inside, you need to glue to the mask, and attach elastic bands or pretty ribbons with a stapler or glue.

To make the mask a real work of art, it can be decorated with applique, lace elements, beads, sequins, rhinestones, beads, etc., in general, you can not limit your imagination.
How to make a papier mache mask? We conjure over paper! was last modified: January 22nd, 2014 by admin
Baba Yaga with my own hands, You will need: plasticine, paper (2-3 napkins, toilet paper and ordinary white xerox sheets), a little flour, water, a brush, watercolors, scissors, a black felt-tip pen and a 3-liter jar.
To make a papier-mache mask, you need a base that we will paste over with paper.
Making the base for the mask
Therefore, we fashion a cake from plasticine, in the form of an oval according to the size of the face.
Plasticine can be replaced with gypsum, modeling clay. To make the base of the mask, I used the usual dough, kneaded with salt water and flour. The dough must rest well to be elastic. It is better, of course, to use plasticine, only such that it is easy to sculpt from it (it must be elastic).
We sculpt the basis for our mask, choosing the necessary desired shape, I got this option, suitable for an elongated face. If the mask is made for a more rounded shape of the face, then it is desirable to make it wider in the frontal part and where the chin is located.

After we blinded the oval, we sculpt the nose of Baba Yaga and attach it in the right part.

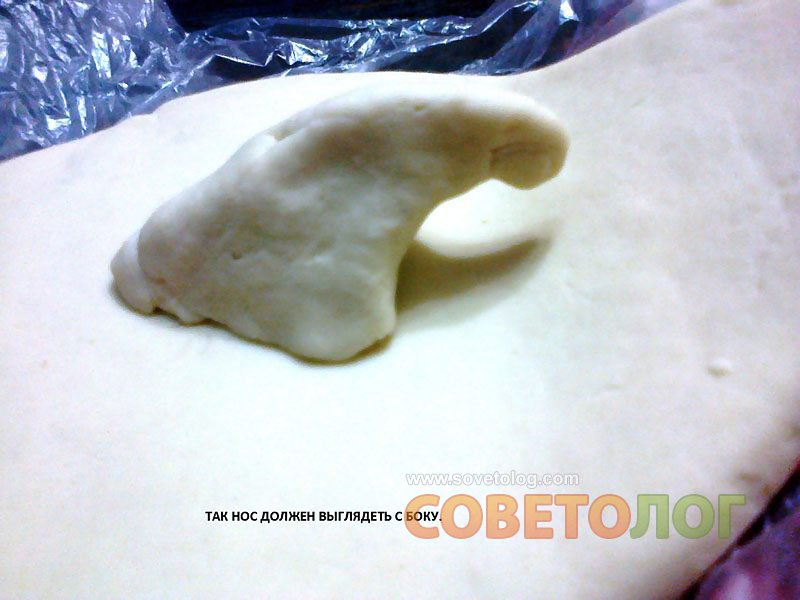


We roll flagella from plasticine and lay out the contours of the eyes with them. The eyes should be made a little wider than in the photo, because after pasting them with paper, they will become narrower.

Then we make eyebrows, cheeks and wrinkles on the forehead. The beard is made convex, in addition to the fact that this part will be raised with the base of the mask. How it should look is also shown in the photo.

After the face is ready, we carefully take our molded mask and put it on the side of the 3 liter jar, and give it the shape of a certain bulge, that is, the face of the mask should acquire a streamlined shape corresponding to the side of the jar. This is to make the mask look natural and not flat.
Using a piece of plasticine, we additionally raise the chin of the mask.

napkin, toilet paper, xerox sheets should be torn into small pieces so that it is convenient to stick them. All torn pieces must be of any arbitrary shape.


Now we make a paste that will serve as an adhesive element for us.

We take a little flour and slowly pour water into it, stirring until a homogeneous mass is obtained, the consistency of which should be like dough for pancakes, that is, not too liquid, but not thick either. The paste should be well applied to the surface of the paper. If the mass is thickish, then a little more water should be added, after which it is again necessary to stir until a homogeneous mass.

Now, we are doing the same thing as with napkins, only instead of water, we use the prepared paste, and instead of napkins - toilet paper or newspaper. We make layers 4, after which we give our mask a good dry. Thus, according to this scheme, it is necessary to apply at least 12-15 layers, periodically drying. In the area under the cheeks, it is worth doing more layers so that the cheeks are not round, but oval, creating the appearance of certain wrinkles.


After drying the product well, carefully remove the plasticine mask, leaving the work glued from the leaves. Thus, we got another mask, but not from a plasticine base, but from a paper one.


Then, using a knife, carefully smooth the edges of the mask, cut out holes for the eyes, mouth and nostrils.

We paste over with 1-2 layers of paper from the inside so that the surface is even as outside. The edges are also carefully glued with paper.
When the mask is ready, we begin to paint it with ordinary watercolor paints the color you want. Between wrinkles, the color should be made a little darker than the main color, thus expressing "light" and "shadow", so that the face looks natural.

When the paint dries, take a black felt-tip pen and outline the contours of the eyes to make them more expressive. How it should look is shown in the next photo, proposed for the work being done.


Now it remains to attach the elastic band to our mask so that it can easily be kept on the head. How it is attached, you can also see in the photo.
Any elastic band is suitable for the mask, but I preferred to take a thin one, so that even without wearing a scarf, it would not be visible under the hair.
An elastic band is attached at eye level with a needle and thread that matches the color of the face of the mask itself. Through the mask we make a stitch with a needle and thread and sew the elastic band to the mask. Then, so that the elastic band cannot come out of the stitch when dressing, we tie it with a double knot in the place where it was sewn with a needle.


The mask is ready. This is how, in principle, the mask of the fairy-tale character of Baba Yaga is not difficult to make. Similarly, you can make masks of other characters, for example, Koshchei, skeleton, fox, bear, etc.

To fully create the image of the fairy-tale character of Baba Yaga, you can use a wig and a scarf.

If you have long hair, for example, like mine, then it is quite possible to do without a wig, loosening it, as I am in this photo, covering your head with a scarf, like this.

Parties, carnivals and balls - these events are not complete without masquerade costumes. And most main detail such attire is often a mask. What to do if you can't buy it? A technique describing how to make a papier-mâché mask will help save the costume. Consider several options for the manufacture of carnival paraphernalia.
Papier-mache, or "torn paper" in French, is an ideal way to make relief crafts: casts, masks for a masquerade or Halloween, various figures for decoration. Working with paper has a number of advantages:
- the availability of the material;
- ease of execution (paper, especially wet, is very pliable);
- a rather short process of manufacturing and drying (it takes about 2 days to completely dry the craft).
The nuances of working with the material
In order for a papier-mâché mask to turn out to be of high quality, it is important to choose the right materials for its manufacture.
- It is better to take newsprint paper: it is thinner, which means it is more plastic.
- The first layers can be made from napkins, just keep in mind that they form folds and lumps when wet. By the way, this property is convenient in the manufacture of masks for the elderly: natural wrinkles and folds are obtained.
- Strips of newspapers are better to tear, not cut. The fact is that torn edges are better aligned on the surface of the product.
Also, for papier-mâché masks, you will need glue. You can use PVA, wallpaper or paste. As for homemade glue, you can make it in just 5 minutes.
Instruction:
- Mix ½ tbsp. water and ½ tbsp. flour (you can take starch).
- Mix thoroughly so that there are no lumps.
- We put on fire and cook for 2-3 minutes until the paste thickens.
- We use cooled glue.
To shape the mask, you need a base. As a base for solidification of the material, you can use:
- Balloon;
- foil cast;
- gypsum;
- polymer clay.
For some options, you will have to apply the material to the face, so it must first be lubricated with a greasy cream so as not to damage the skin.
Consider a technology that describes how to make papier-mâché at home using a foil base.
Materials:
- foil;
- several napkins;
- a couple of sheets of white writing paper;
- newspapers;
- paste;
- sandpaper;
- brushes (thick for applying paste and thin for decoration);
- paints (for example, gouache);
- decorative elements (rhinestones, beads, ribbons, lace).
Instruction:
- We put several layers of foil on the face, give it the shape of bulges and bends.
- We remove the base, make cuts for the eyes.
- Let's get to the mask. We tear strips from newspapers about 8 cm long and 2 cm wide.
- Wet the wipes with water and apply them to the base.
- Next, we dip each piece of newspaper into the glue and glue it to the base, brushing well on top with a brush dipped in paste.
- We spread 2-3 layers and level the surface, releasing air and removing irregularities.
- In total, we apply about 8-10 layers.
- The last layer is made of white paper.
- We make holes for the nose and mouth.
- Let the mixture dry for 2 days.
- Sandpaper smooth the surface of the mask.
- Let's get to the decor. We apply several layers of paint with a brush, decorate with rhinestones, lace.
It is convenient to make a mask in the style of the Venetian carnival on a plaster mold.
Materials:
- sheet of paper, pencil;
- 2 small bags of alabaster (gypsum);
- plasticine;
- newspapers;
- stationery knife;
- glue brush;
- paste;
- PVA glue;
- a piece of velvet;
- braid;
- thread, needle, pins.
Instruction:


