At first glance, it seems that there is nothing simpler than hanging ceiling cornice for curtains However, when installing bus-type systems, many encounter difficulties. Let's take the advice of experts and figure out how to avoid mistakes and install plastic curtain hangers correctly.
Getting to know simple principles It won’t take much time, but it will eliminate unnecessary costs. And when correcting the consequences of improper fastening, extra costs are inevitable.
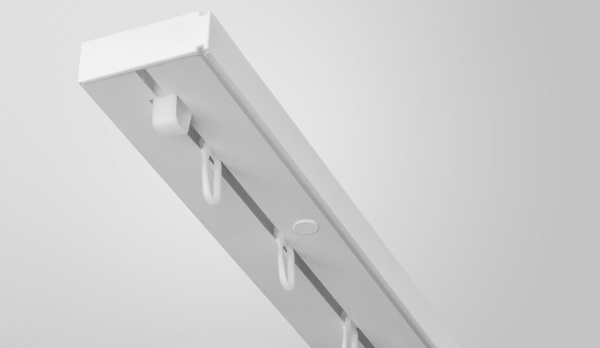
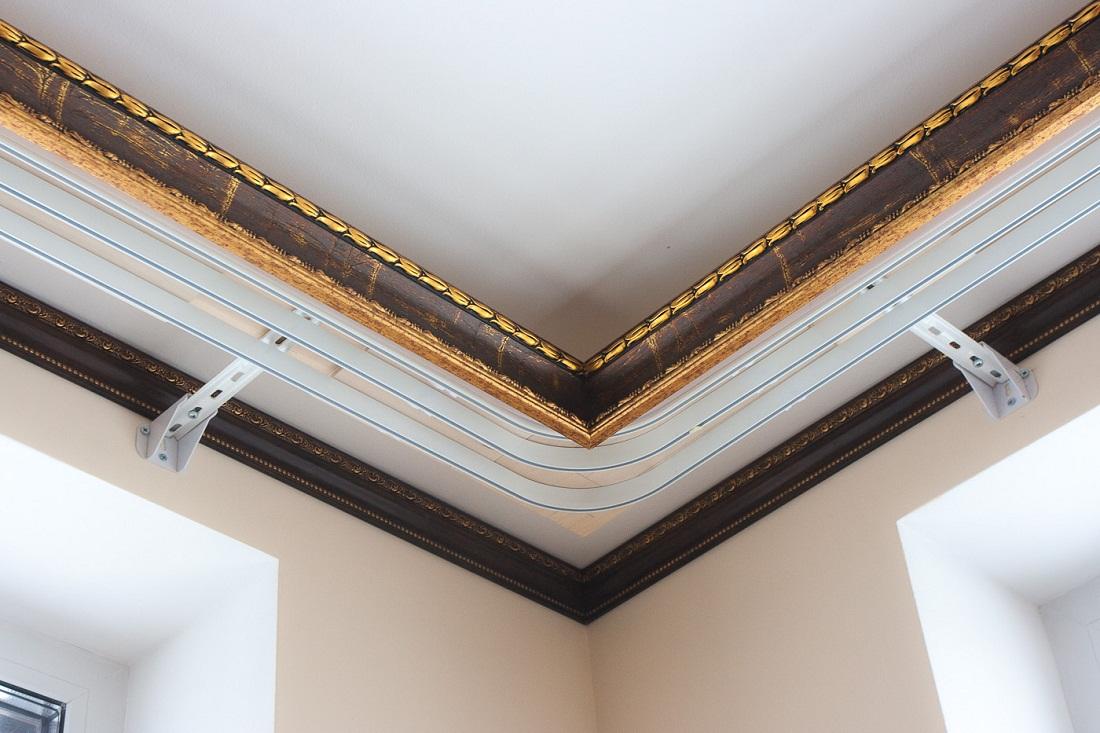
Before learning how to hang a plastic ceiling cornice, let's remember what it is. A flat plastic profile with runners for roller hooks, to which the curtain fabric is attached. The design can be a simple version and is completed at both edges with end caps. But most often the “tire” is supplemented with removable rotating elements. Thanks to them, the curtains are smoothly framed window hole and harmoniously design the junction of the cornice to the wall. Also, the range of components for ceiling cornices from OLEXDECO includes a front strip and connecting elements.
Kinds
Plastic “tires” have the same structure and are divided only by the number of rows for roller hooks:
- single row version– designed for lightweight fabrics that serve primarily an aesthetic function. Often combined with roller blinds, ensuring the creation light mode;
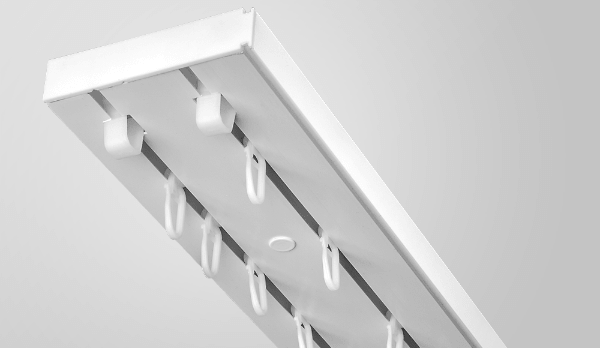
- two-row modification– the most common type. It is used for classic combination tulle curtains and curtains from thick fabric;
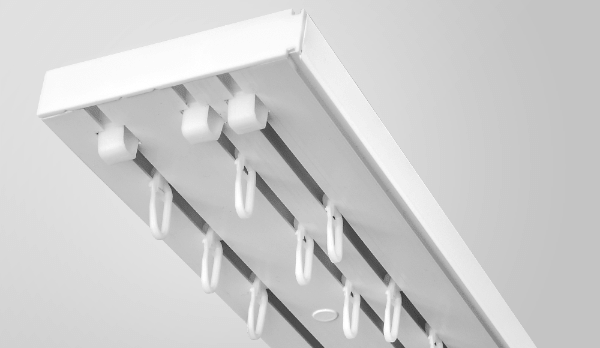
- three-row variety– used to create a complex curtain ensemble. This version of the suspension system has the greatest width and weight. Therefore, an additional number of fastenings should be provided for it.
Installation benefits
Reasons why many people prefer this species hangers for curtains, several:
- reasonable price, especially in comparison with more complex curtain systems. Optimal combination cost and quality are a very attractive factor. On the OLEXDECO website you can select the desired option in the catalog of plastic ceiling curtain rods;
- the ability to attach curtains made of massive materials to tire-type products. This is possible due to the high safety margin of the plastic profile;
- low weight of profile slats – ideal condition when mounted on a plasterboard surface or stretch ceiling;
- ability to change the location of the profile block, choosing wall-mounted or ceiling option;
- To install a “tire” you do not need specific skills or complex tools.
How to hang on the ceiling
Any installation instructions this option the cornice must contain a description the right tools and details. Scroll necessary equipment depends on the installation method:
- if fastening to fixed surface, you only need screws and dowels;
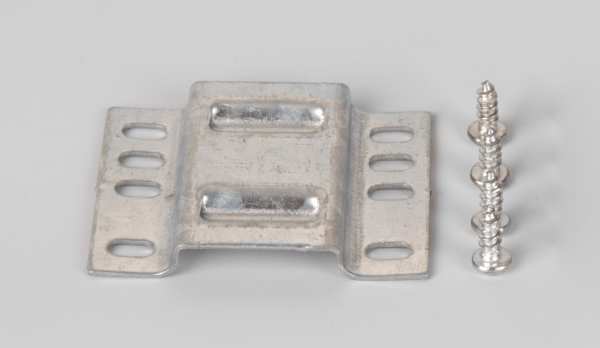
- It is possible to use intermediate brackets. If we are dealing with a special plastic bracket, then no additional spare parts are required. A metal bracket requires a mounting plate adjacent directly to the profile strip;
- thus, the list of tools is small - a hammer drill for drilling holes, dowels and screws for attaching, a screwdriver or screwdriver.
An important stage in adjusting the profile hanger for curtains is the preliminary marking of the general dimensions and installation locations of fasteners or holders. If the installer makes a mistake with the dimensions, the product will have to be hung again. Special attention requires a distance from the wall. If the distance is too short, the curtains will fall on the windowsill or radiators.
If the distance from the wall is too large, the curtains will “eat up” a significant usable area premises. In order for the “tire” to fit tightly to the ceiling, the gap between the fasteners should not exceed 50 cm. To be safe, it is better to play it safe and place the fasteners at intervals of 20-25 cm. When we are talking about a wide multi-row product, it makes sense to place the supports in two rows.
What to do at the preparation stage
Preparatory actions are no less, rather, even more important. In addition to selecting structural elements and tools, as well as making work marks, preparation of the working surface is of particular importance. Installation on a monolithic plane of a wall or ceiling does not require any special preliminary actions. It is much more troublesome to work with plasterboard walls and suspended ceiling.
The best option in such situations is to install mortgages to which the busbar structure is attached. This eliminates the risk of sagging and damage. decorative coatings. Usually mortgages are wooden blocks, securely connected to the base level. It is best to provide a niche for mortgages at the stage of creating “double” walls and ceilings. Making recesses in ready-made surfaces is labor-intensive and does not always lead to a decent result.
How to mount correctly
IN technically there is nothing complicated about how to attach them. Nuances arise when a situation arises with different types base surface:


- There are fewer problems when there is a monolithic plane, be it a ceiling or a wall. It is enough to drill holes for dowels in the marked places and then screw the profile block;
- its installation on suspended ceiling will require the use of wooden mortgages. It is to them that the profile needs to be screwed. In this case, wood screws are sufficient, the main thing is that they are of sufficient length;
- a special case is drywall. This is a weight-sensitive material. Therefore, it is best to mount the product using lightweight plastic brackets. They will help distribute the pressure of the additional mass. For extra confidence, you can use a butterfly dowel. Sliding inner part The device will give the fastener additional reliability.
The OLEXDECO trademark offers a wide selection of various curtain rods and accessories for them. Here you can choose from favorable conditions buy any accessories for decorating the window space.

- Complete set of cornices for the ceiling and tools for installation
- Installation of ceiling cornice
- Installation of ceiling cornice to the wall
- Attaching curtains to ceiling cornices
- At what distance from the floor should curtains be hung?
When renovating an apartment, many people wonder how to hang new curtains on the ceiling cornice. Ceiling cornices are quite attractive in that they hardly stand out in the interior, and correctly selected curtains can become a real decoration of the room and attaching them to the cornice is not at all difficult.
Many owners choose a ceiling cornice for the interior of their home.
Complete set of cornices for the ceiling and tools for installation
When purchasing a ceiling cornice, you need to make sure that it is fully equipped so that there are no problems with its installation later. The main element of the kit is plastic profile with special grooves applied to it, its length varies from 1.2 m to 6 m, which allows you to cut off the size needed for the cornice. The kit may also include rotating elements, plugs, dowels, and various decorative components.

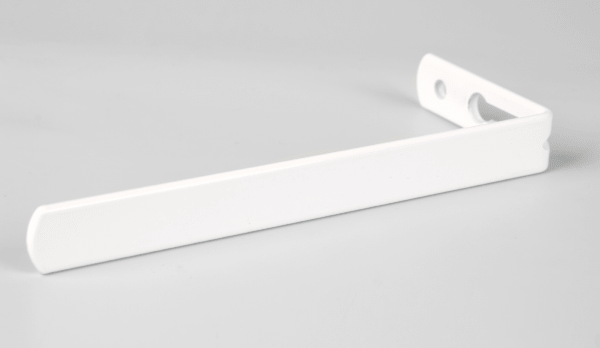
The ceiling cornice can also be mounted to the wall using a special bracket.
In order to secure the cornice to the ceiling you will need the following types tools:
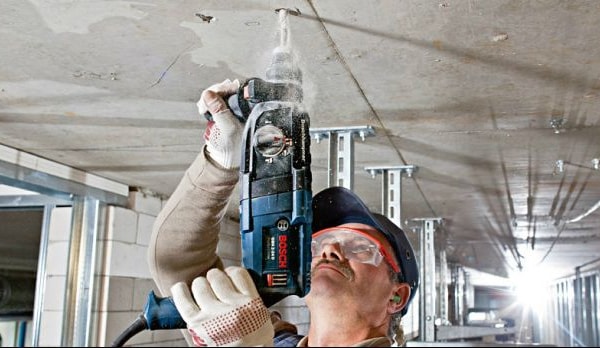
- electric drill;
- hacksaw for metal;
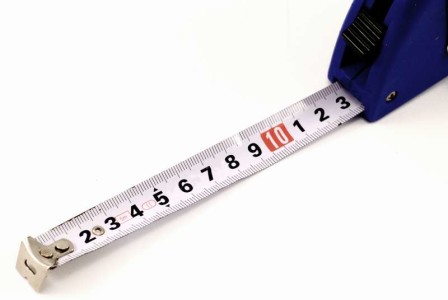
- roulette;
- screwdrivers;
- building level;
- ruler;
- pencil;
- screws and dowels.
Return to contents
Installation of ceiling cornice
Attaching the cornice to the ceiling is not particularly difficult, which is its great advantage. First, you need to determine the layout of this decorative element; the length of its elements will depend on this. Next you need to measure and then saw off the profile with a hacksaw the right size, and if it does not have mounting holes, then they must be drilled with a drill, taking into account the size of the heads of the mounting screws. On average, the distance between the holes should be about 50 cm.
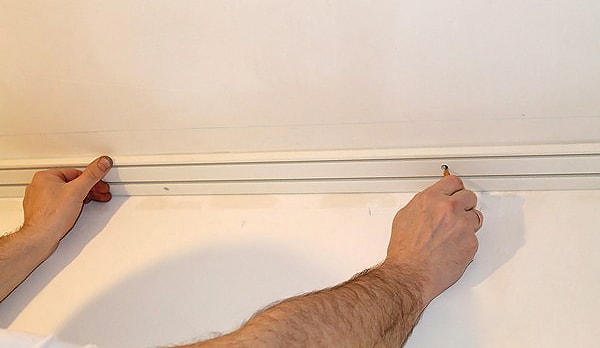
Before fastening it is necessary to carry out correct measurements length of the cornice.
Next, the profile is applied to the place where it should be screwed, and the locations of the holes for the screws are marked with a pencil. When determining where to attach the curtain rod, several nuances should be taken into account: the curtain rod line should not be located very close to the window and the radiator, this will avoid the curtains getting caught when they move, the optimal distance is about 40 mm. Then holes are drilled in the designated places with a drill and dowels are inserted into them.
After this, the cornice is applied to the ceiling and firmly screwed into the intended holes. Despite the fact that the profile of the cornice is very soft, you should carefully hold it during installation to avoid breakage in sagging areas. Next, the rotating elements of the cornice are attached to the ceiling in the same way.
Return to contents
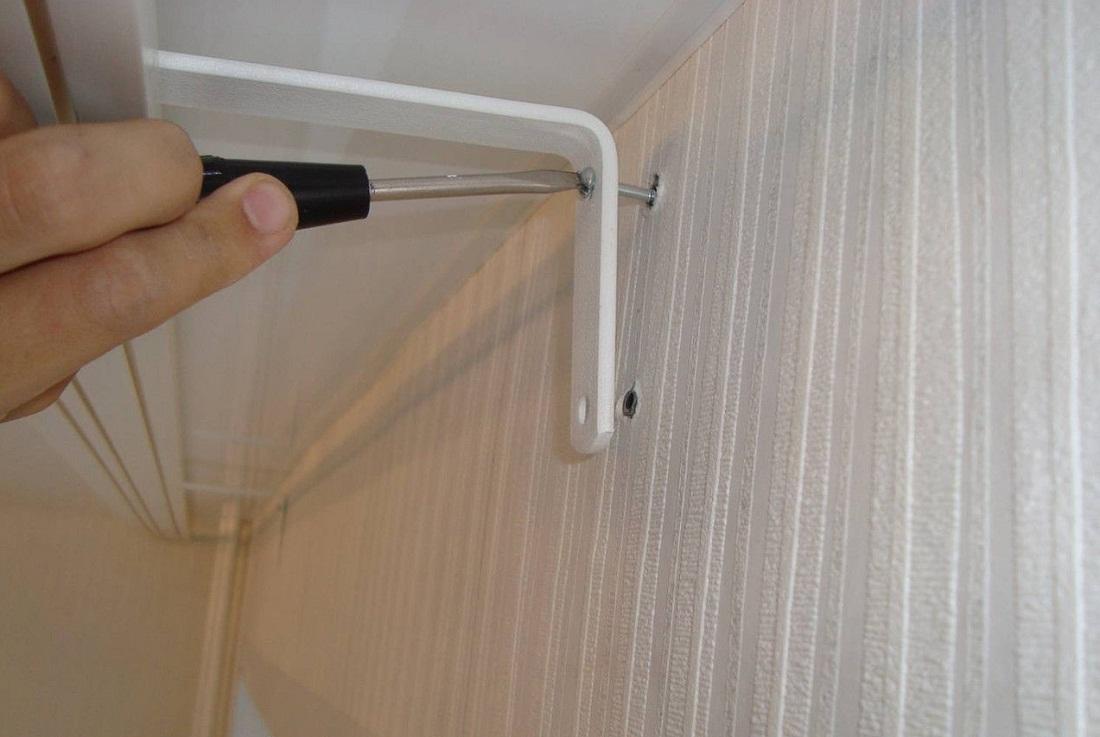
Installation of ceiling cornice to the wall
Sometimes a situation may arise when attaching a ceiling cornice to the ceiling is impossible, but the apartment owners want exactly that. To get out of this situation, there are special brackets that allow you to fix the cornice on the wall. At this method installation, the brackets are installed on the wall, and the cornice is attached to them using special plastic plates. This process is also not particularly difficult and is completed quite quickly. The choice of distance between the brackets depends on the weight of the curtains; if you plan to weigh massive curtains, then the brackets should be placed no further than 50 cm from each other.
Return to contents
Attaching curtains to ceiling cornices
Before attaching curtains to the curtain rod, it is necessary to analyze some points:
- design and style of the room;
- method of fastening the cornice;
- number of layers of fabric and the presence of lambrequins;
- weight of curtains;
- cornice shape.
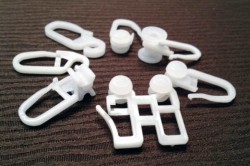
Most often, curtains are attached to the cornice using hooks.
The curtains need to be selected in such a width that they protrude beyond the edges of the window by at least 15/20 cm, in this case they will look more attractive and cover the window sill and radiator. Depending on the type of curtains, a two-row, three-row or four-row cornice is selected.
There are the following types of fastening curtains to the cornice:
- hooks and rings - these are best suited for light curtains;
- eyelets are metal rings that are inserted into the fabric and allow curtains to be automatically folded;
- “crocodiles” - function as clothespins, and the presence of teeth contributes to the strong fastening of curtains;
- fabric loops - made from the same fabric as the curtains;
- clips - similar to “crocodiles”, but do not have teeth;
- Drawstrings are special pockets for putting on curtains, with a frill on top that allows you to completely close the cornice.
Once the type of fastener has been selected, you can begin hanging the curtains on the cornice. Every fastener It is quite convenient to use and can be easily attached to curtains, after which it must be inserted into the guide grooves. If you need to get beautiful folds on the curtains, then the fastening parts are placed at the same distance from each other, approximately 10 cm.
There are especially lightweight designs for which liquid nails can be used. Weight innovative developments significantly simplifies a person’s life, because for such installation you do not need to have special specialist skills. Naturally, when doing such actions, you need to remember preliminary work on surface preparation, selection of material for installation and the cornice itself. It is worth remembering that high-quality liquid nails can withstand a lot of weight, but if you plan to use multi-tiered curtains from such heavy material, like jacquard, it is much better to give preference to a more durable hanging cornice made of plastic. In addition, the glue can dry out over time, which will lead to collapse of the structure, repeated actions and additional costs.
Attaching ceiling cornices to the ceiling
Before attaching the cornice to the ceiling, you need to prepare properly.
Namely:
- Clean the ceiling from dirt, unevenness and potholes;
- Remove roughness;
- Foam the seams between the slabs to prevent drafts or cracking of the plaster;
- Apply markings that will be equally located relative to each side of the window.
If a plinth for the ceiling was previously installed on the side of the window, you will have to get rid of it. The marking is applied at the same distance from the wall with the window, even if it is uneven, since such a defect can be hidden with the help of curtains, and besides, it is extremely rare to find a room with perfect smooth walls. Next you need to make holes spaced 60 centimeters from each other. If the curtains are too heavy, then the step is taken less. Then the cornice is attached to the ceiling using a dowel-nail.
Important! If the cornice is too soft, then during installation it is advisable to lay metal plates between it and the ceiling.
On last stage stringing of hooks and placement of plugs takes place. On sale you can find special dowels designed specifically for cornices. Their peculiarity is that wedging is carried out from the inside out, which is very convenient and reliable.
How to attach a ceiling cornice to a suspended stretch ceiling
There is a far from correct opinion that hanging cornices on suspended ceilings is strictly prohibited. In fact, this is quite possible, but you will need to properly prepare for the installation process.
Namely:
- Partially remove ceiling covering or even carry out the steps described below before installing it.
- You need to attach a block to the base ceiling slab; its length should be equal to the cornice.
- Next, the rings required for installing the cornice are attached to the beam.
- Then the ceiling is stretched.
- In the place where the timber is laid, you need to strengthen the cornice.
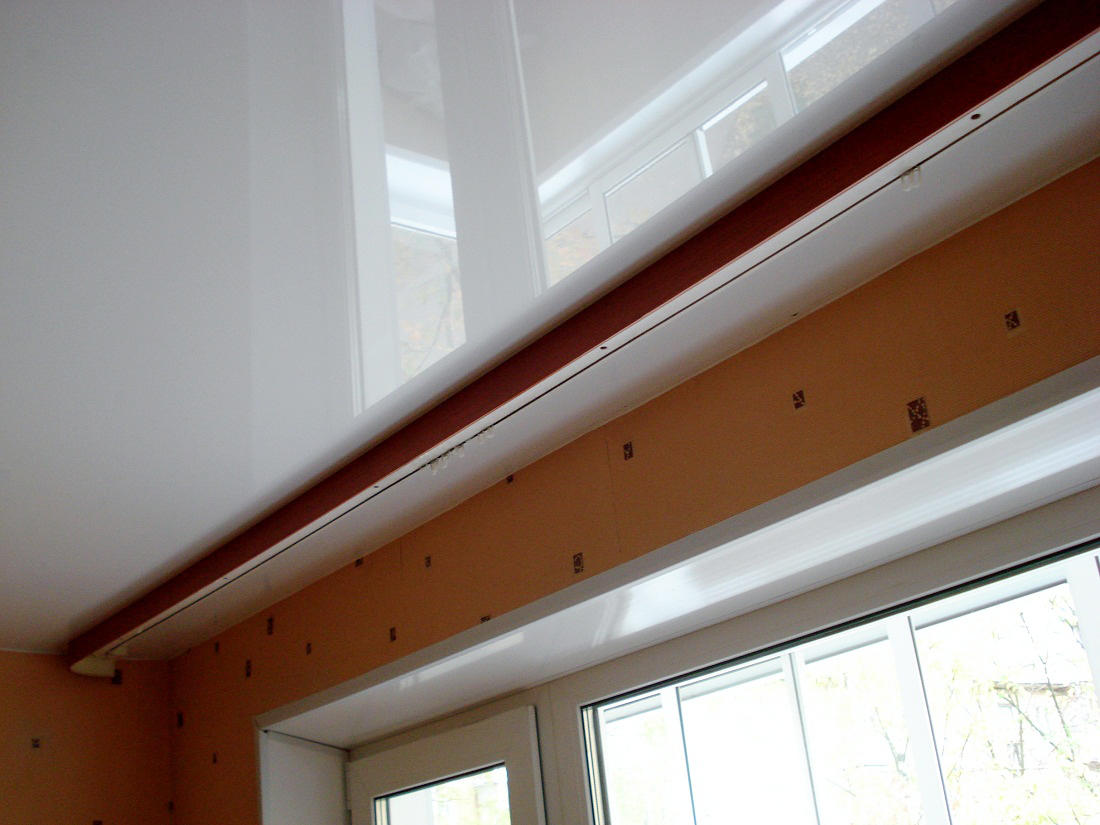
There is another option by which you can install a base for future curtains. It consists of installing a block in front of the ceiling directly on the wall where the window frame. This method is no less practical, since it will create a fusion of curtains and ceiling, which looks quite impressive. In this case, wall brackets should be used for the cornice. Much more often it is necessary to hang the curtain rod directly on the concrete ceiling.
There are also several ways for this installation:
- If the cornice is visible, then the fixation is carried out on a hidden support bar located on the ceiling.
- Initially, a hidden ceiling cornice is installed, and on top you can apply either stretch fabric, or completely plasterboard.
The first method is more practical, easy and familiar, and most importantly, low-cost.
Attaching a cornice to a plastic ceiling
To place curtains in a room, you definitely need to hang a curtain rod, which can be secured in various ways.
In addition, there are several types of cornices, among which you can choose the most suitable option:
- The rod with brackets is both a wall and ceiling option. On sale today a large number of rods, and specifically decorative ones, to decorate the room and add comfort to it.
- String cornices are quite simple in appearance, since they are a structure made of a string and two clamps. Today, such products are practically not used, since they do not have much strength, and therefore are not suitable for placing heavy material.
- Curtain rods are guides with one to four grooves in which hooks move freely to hold curtains. This type is considered the most optimal, affordable and aesthetically pleasing.
Installing any of the above cornices is very easy and can be done without contacting specialists.
To install a cornice rail on a ceiling covering made of plastic panels, you will not need much effort, since the panels have high rigidity, higher than that of plasterboard. The tires are attached to a pre-made sheathing using self-tapping screws for wood or metal. The choice depends on what the sheathing is made of. Craftsmen advise drilling holes in the slats in advance to prevent cracks from appearing when screwing in the self-tapping screw. Optimal design combination is considered plastic panel, wooden slats and metal slats.
At what distance from the ceiling should you hang a cornice?
To determine at what distance from the wall or at what height to place the cornice, you don’t need to be experienced specialist. To do this you need to spend a maximum of 10 minutes.

For quick and high-quality installation and marking, you should initially use:
- Level;
- Roulette;
- Chalk.
Due to the fact that there are two types of cornices, there is absolutely no difference regarding their location on the ceiling or close to the ceiling, and at what height it will be suspended. The only thing worth noting is that there are recommendations regarding the length of the cornice, since it should exceed the length of the window by 35-45 centimeters on each side, and the optimal distance for placing the curtains from the window sill is a distance of five centimeters.
This feature will prevent the canvas from getting dirty quickly and will allow you to open the doors freely without touching it.
If there are radiators under the window, then you need to make sure that the product does not touch them, which will damage the material and may cause melting. That is why, when applying markings for the cornice, you need to take into account all the above-described nuances.
Instructions: how to attach a ceiling cornice to the ceiling (video)
1.00 (1 Vote)Attention, TODAY only!


